Loyverse POS supports barcodes that can be scanned using compatible barcode scanners or the built-in camera of mobile devices. Adding barcodes to items allows you to speed up sales and inventory management.
Adding Item Barcodes in the Back Office
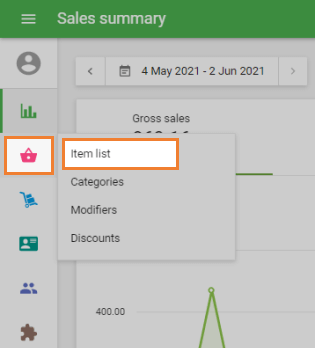
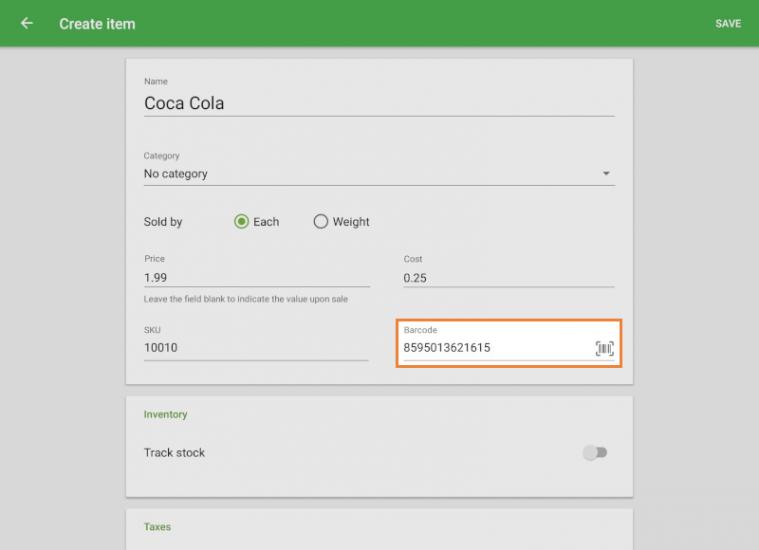
Go to the Item list menu.
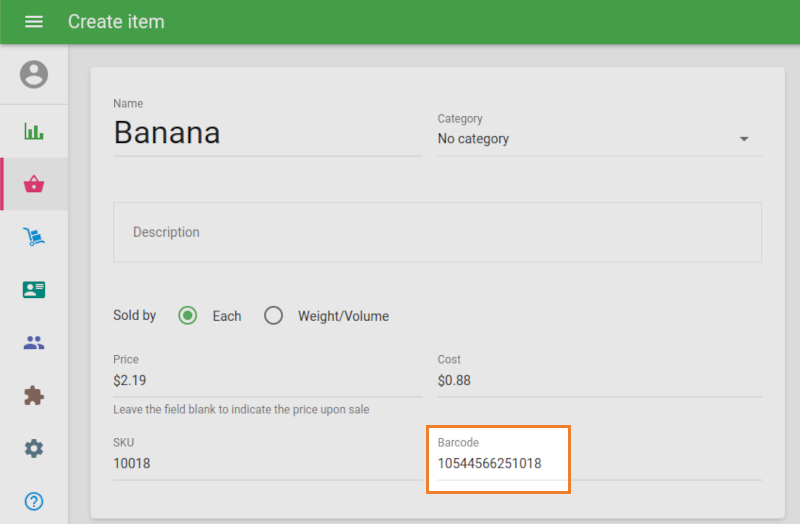
Find the item and open its card.
Enter the barcode manually into the Barcode field.
Alternatively, you can use a barcode scanner:
- Connect a scanner to your PC or tablet (the device you use for the Back Office).
- Click on the Barcode field to activate it.
- Scan the item’s barcode tag, and the number will automatically appear in the field.
Note: Always make sure the Barcode field is active (clicked) before scanning with a scanner.
You can also add barcodes via file import:
- Export your items list.
- Enter barcodes into the Barcode column of the exported file.
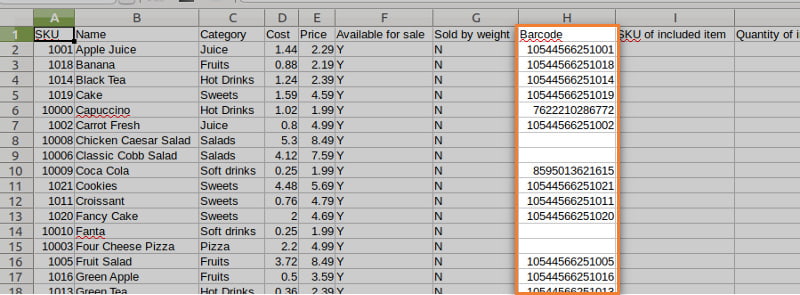
- Save the file and re-import it into the system.
Adding Barcodes Using the Loyverse POS App
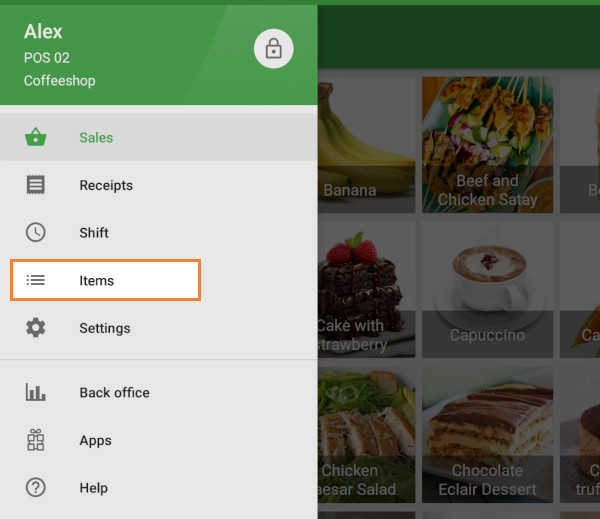
Open the POS app and tap the ☰ menu in the top-left corner.
Go to Items.
Open the item card you want to edit.
Enter or scan the barcode into the Barcode field.
On mobile devices, you can also use the built-in camera to scan barcodes:
- Tap the barcode icon in the right corner of the Barcode field.
- Use your device’s camera to scan the barcode.
Now your items are ready to be sold and tracked using barcodes.
See also:
Socket 7Qi/7Ci (Bluetooth) Scanner Setup
How to Setup Motorola CS3070 (Bluetooth) Barcode Scanner