To speed up the sales process and accurately link receipts to customers, Loyverse POS allows cashiers to add customers to a receipt by scanning a barcode from their loyalty card. This can be done using a barcode scanner or the device’s built-in camera.
Important: Before scanning a barcode, the customer's unique code must first be saved in their profile.
1. Add a Customer Code During Registration at POS
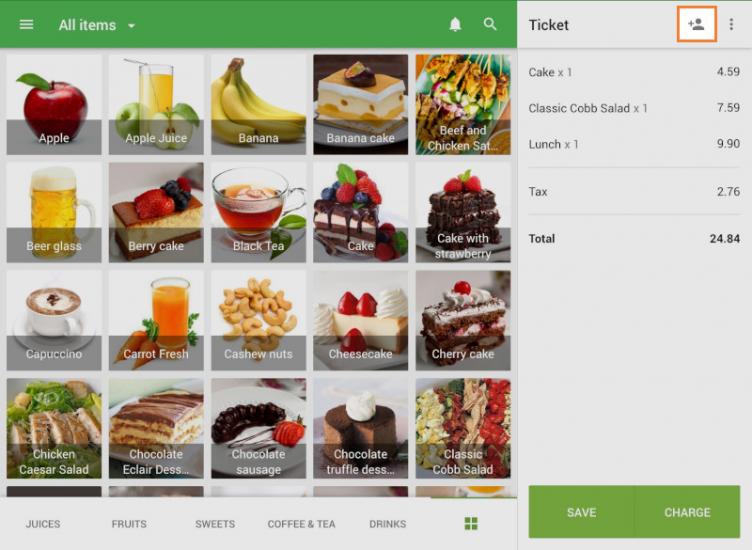
At the sale screen, tap the ‘Add client’ icon (top-right corner).
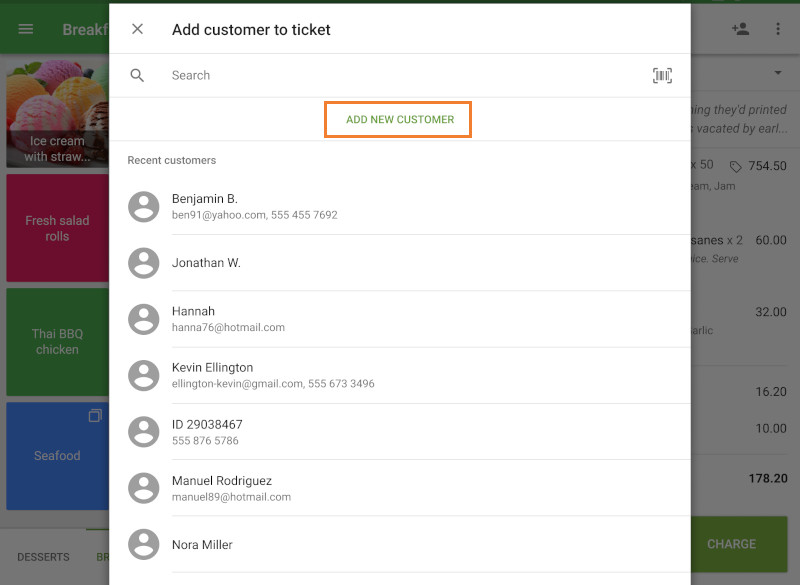
Tap ‘Add new customer’.
In the ‘Customer code’ field, enter the barcode value:
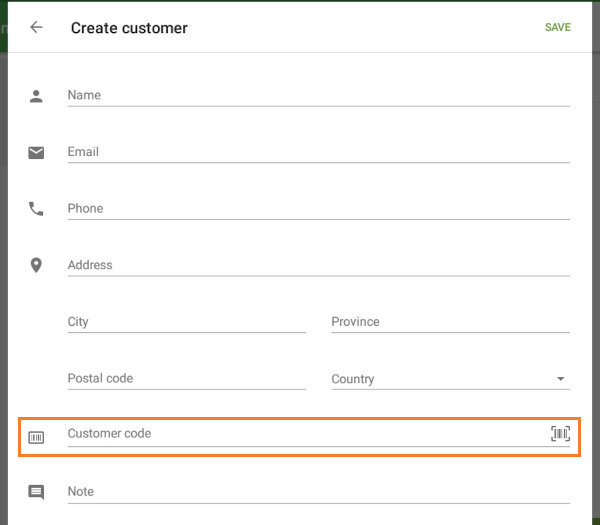
- Manually using the keypad,
- With a barcode scanner, or
- By using the built-in camera (ensure the ‘Use camera to scan barcodes’ setting is enabled).
Tap ‘Save’ to register the customer with the code.
2. Add or Edit Customer Code from the Back Office
Log in to the Back Office.
Go to Customers → open an existing profile or create a new one.
Enter the customer’s code in the ‘Customer code’ field.
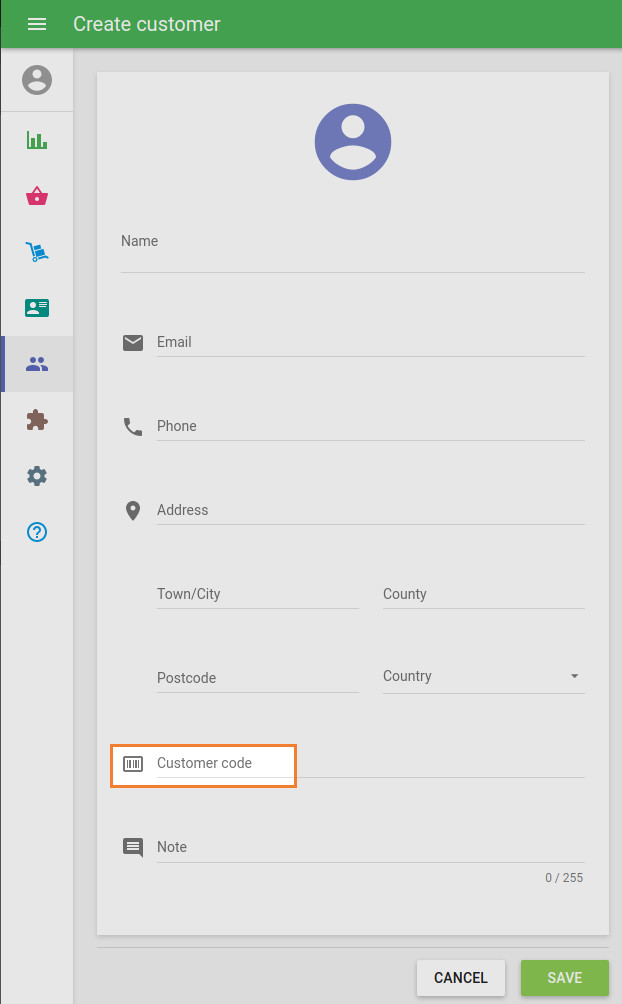
Click Save.
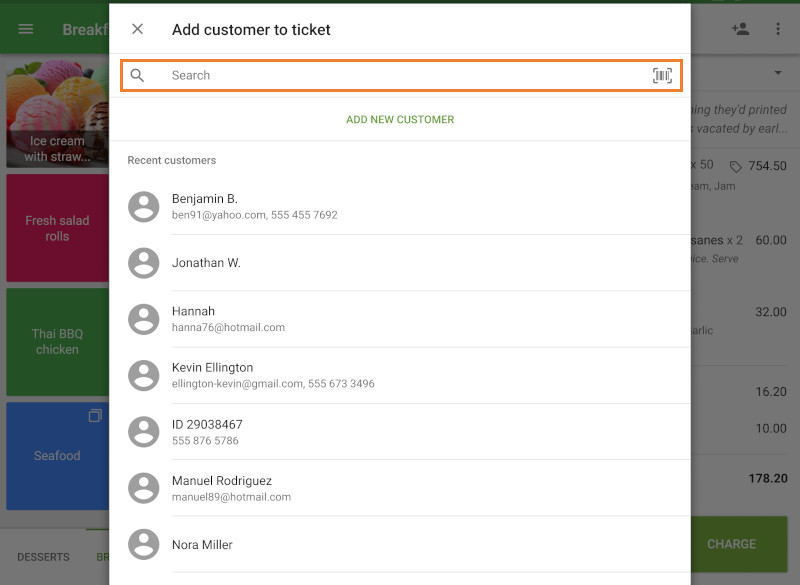
3. Add Customer to Receipt by Scanning a Code
Once the customer codes are saved in their profiles, you can identify customers during a sale:
At the sale ‘Add customer to the ticket’ screen, scan the barcode from the customer’s card using:
- A barcode scanner, or
- The built-in camera (if enabled in settings).
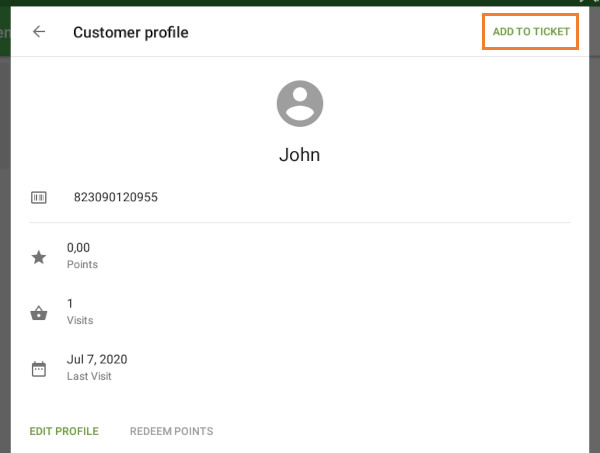
If the scanned value matches a customer code:
- The customer’s profile will open.
- Tap ‘Add to ticket’ to link the customer to the sale.
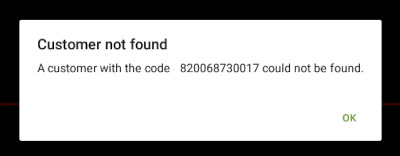
If no match is found:
A message will appear: “Customer not found.”
4. Find Receipts by Customer Code
You can also use the customer code to search receipts:
- Go to the ‘Receipts’ menu at the POS.
- Use the customer code in the search bar to view all sales linked to that customer.
This method is especially useful for loyalty programs, ensuring customers receive points and benefits automatically.
See also: