You can create and manage discounts in both the Back Office and the Loyverse POS mobile app. Discounts can be set as a percentage or a fixed amount and can be restricted to authorized employees.
Creating Discounts in the Back Office
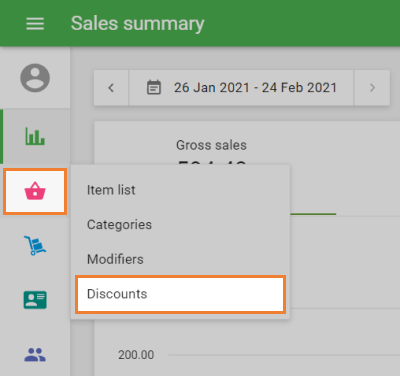
- Log in to the Back Office.
- In the ‘Items’ menu, select ‘Discounts’.
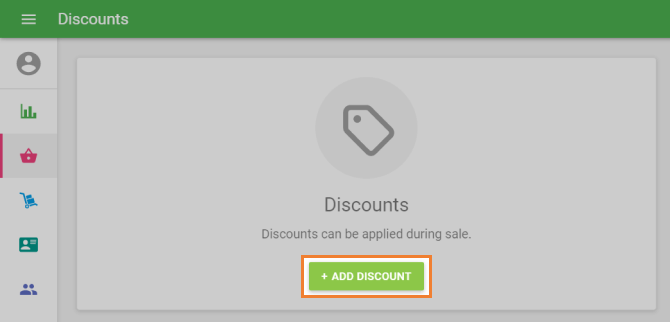
- Click the ‘+ Add Discount’ button.
Fill in the details:
Name – Give your discount a clear and recognizable name.
Type – Choose between:
- Percentage (%) – Can be applied to the entire ticket or individual items.
- Amount (∑) – Can only be applied to the entire ticket.
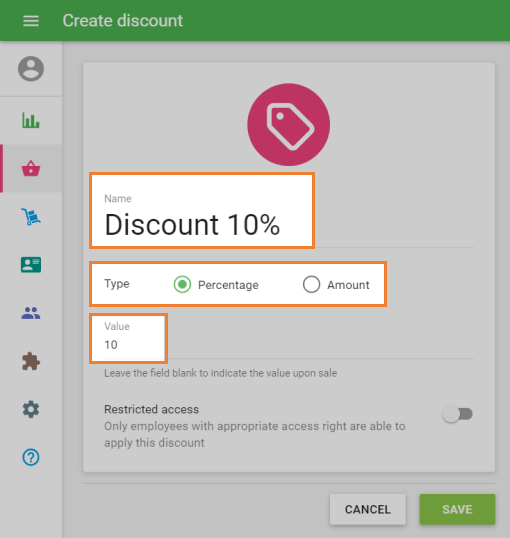
Value:
- For Percentage discounts: Enter a number between 0.01% and 100%.
- For Amount discounts: Enter the fixed amount to be deducted.
- You can leave the Value field empty to set the discount amount during the sale (only applicable to whole-ticket discounts).
Optional:
Restricted Access – Activate this option to allow only employees with the corresponding access right to apply this discount.
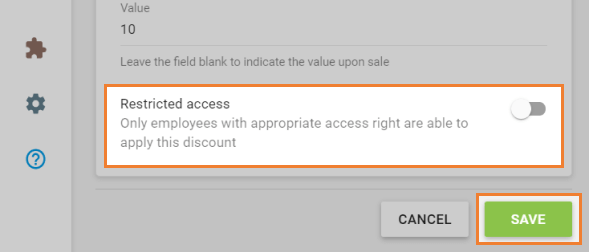
Click ‘Save’ to store your discount.
Creating Discounts in the Mobile App
- Open the Loyverse POS app.
- From the main menu, go to ‘Items’.
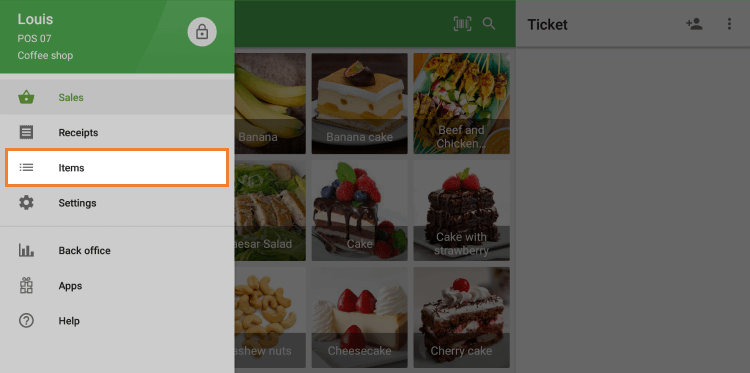
- Tap ‘Discounts’ to view all discounts created in both the Back Office and the app.
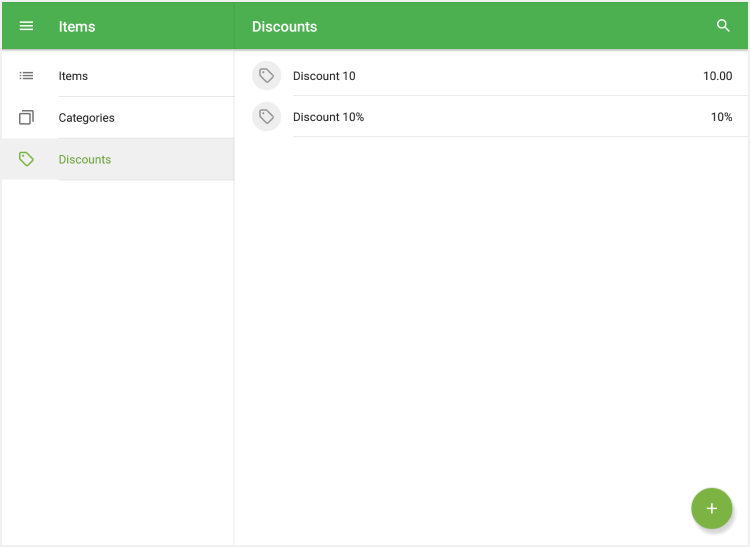
- To create a new discount, tap the ‘+’ button in the bottom right corner.
Fill in the details:
Name – Enter the discount name.
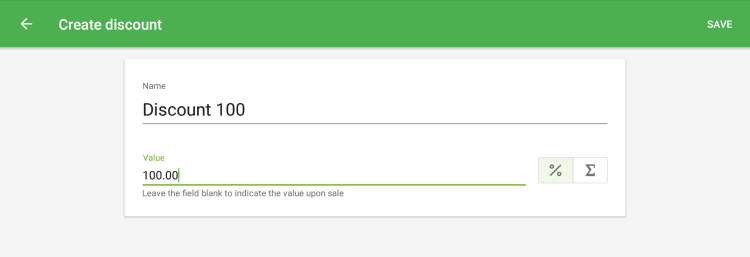
Type – Choose:
- Percent (%) – Applies to the whole ticket or individual items.
- Amount (∑) – Applies only to the whole ticket.
Value – Enter the percentage or amount (optional if it will be set during the sale).
Tap ‘Save’ to confirm.
Applying Discounts During Sales
Once your discounts are created, they will be available to apply during checkout. Depending on the discount type, you can:
- Apply to specific items from the ticket.
- Apply to the entire ticket.
For detailed steps on applying discounts during a sale, see the guide: How to Apply Discounts During a Sale.