For a USB printer to work with Loyverse POS, you will need the following
- Smartphone or tablet (with OTG support) with the Loyverse POS app
- USB printer, supported by the Loyverse POS app (should support ESC/POS protocol, see also a list of Supported Printers)
- USB type A to type B cable (goes together with the printer)
- USB OTG adapter or cable
- USB Hub if you want to connect several printers
Plug one end of the USB cable into the USB port of the printer, and the other end into the female USB connector of an OTG adapter or cable. Then, plug the micro-USB end of the OTG adapter or cable into the micro-USB port of your mobile device, and wait for the system to recognize the printer.
If you want to connect several printers, connect them via the USB Hub. The USB Hub connects to your mobile device through a USB OTG adapter or a cable.
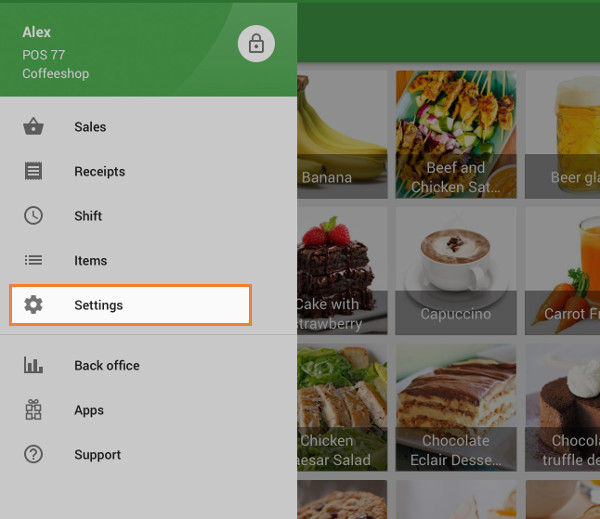
Then, in the Loyverse POS app, go to Settings.
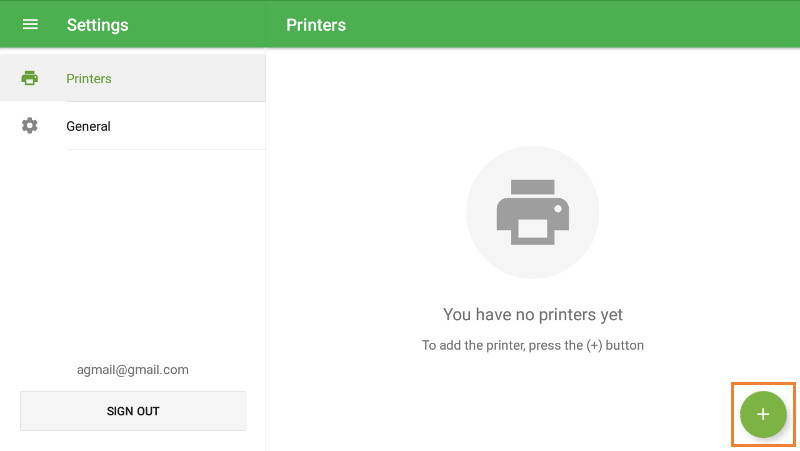
Create a printer by tapping on the ‘+’ button.
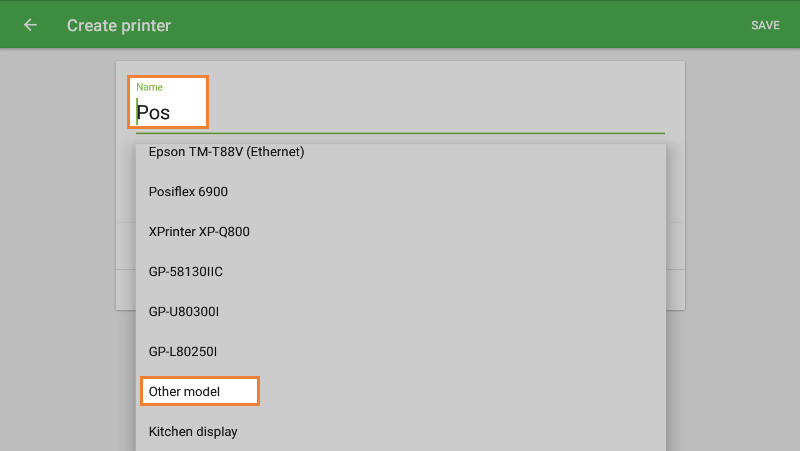
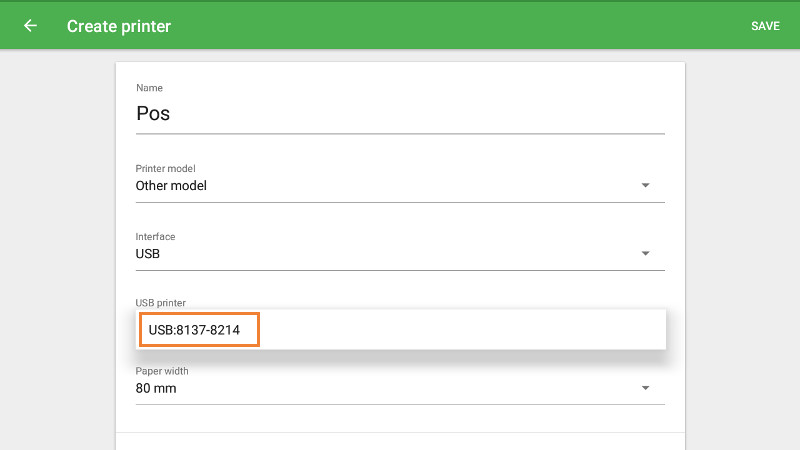
Name your printer in the ‘Name’ field and select ‘Other model’ from the ‘Printer model’ list.
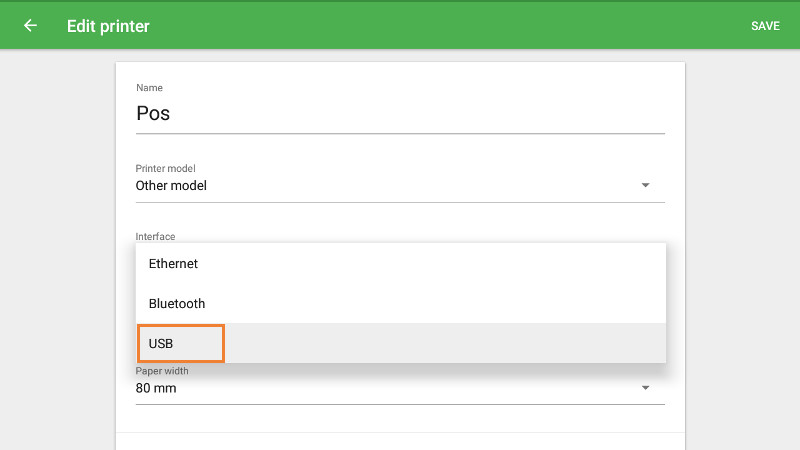
Select ‘USB’ in the ‘Interface’ field.
Now, select your printer from the drop-down menu. USB Printers are named in USB: VID-PID format. VID stands for Vendor ID, and PID is the Product ID.
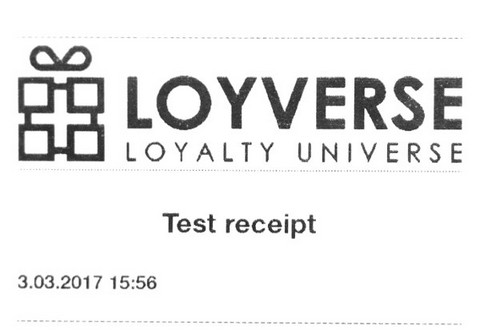
Tap the ‘Print test’ button to test your printer’s connection with the Loyverse POS app.
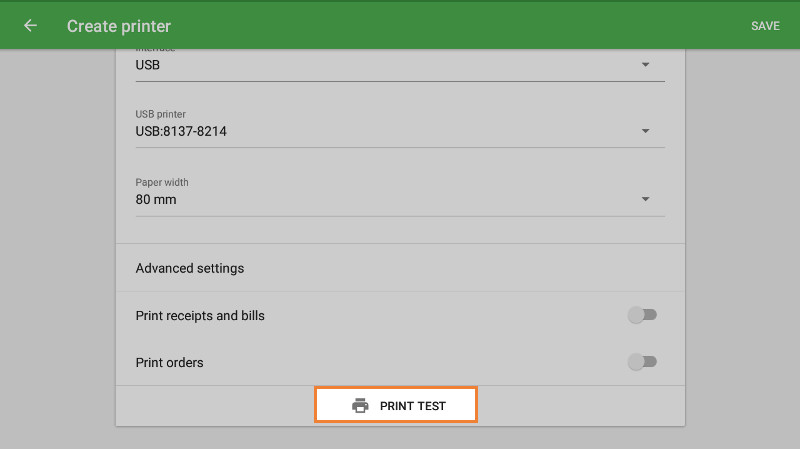
If a test receipt prints out successfully, then your printer is set up correctly.
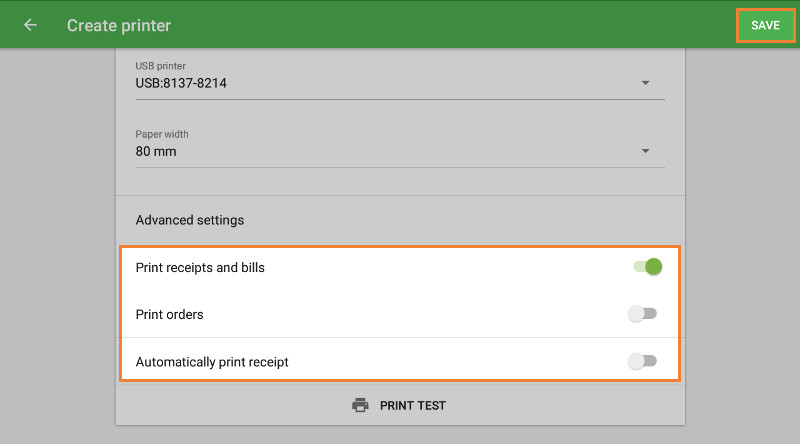
Choose the settings for your printer depending on how you want to use it. Don't forget to save all of the settings at the end, by tapping on the ‘Save’ button.
Now you can see your printer in the list. Nice work!

See also: