Loyverse POS works with receipt printers on the Supported Printers list. However, for Android, you can try to connect to models that are not on the Supported Printers list. But be aware that not every printer may work with Loyverse POS!
These are the general requirements for a receipt printer to be compatible with Loyverse POS on Android devices:
- support ESC/POS commands that are the same as Epson printers;
- have either Ethernet, WiFi, Bluetooth, or USB interface;
- support the status commands or similar functions to check that the transmitted data has been completely printed.
Consult the printer manual or the manufacturer's website to see if your receipt printer fits these requirements. If so, the printer may work with Loyverse POS; however, there might be special cases.
Connect or pair your printer with a mobile device
For Ethernet printer: connect your mobile device to the Wi-Fi router and connect your Ethernet printer to the router via an ethernet cable (details: How to Set Up an Ethernet Printer in Loyverse POS).
For Bluetooth printer: pair a printer with your mobile device (details: How to Set Up Bluetooth Receipt Printer with Loyverse POS).
For USB printer: connect your mobile device to the USB printer via a USB cable and OTG adapter or cable (details: How to Set Up a USB Printer with an Android Device).
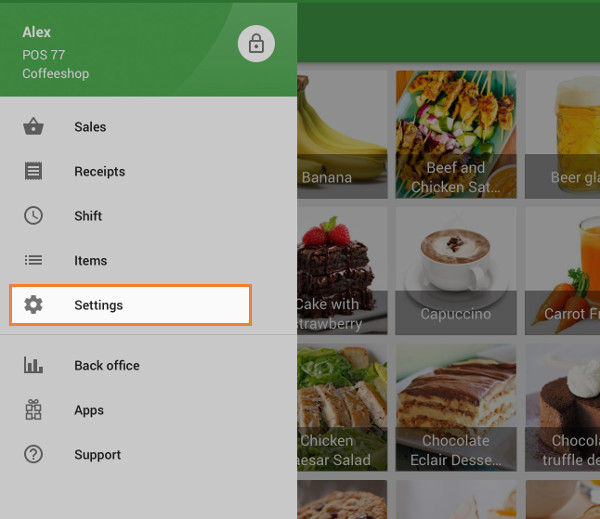
Then, in the Loyverse POS app, go to Settings.
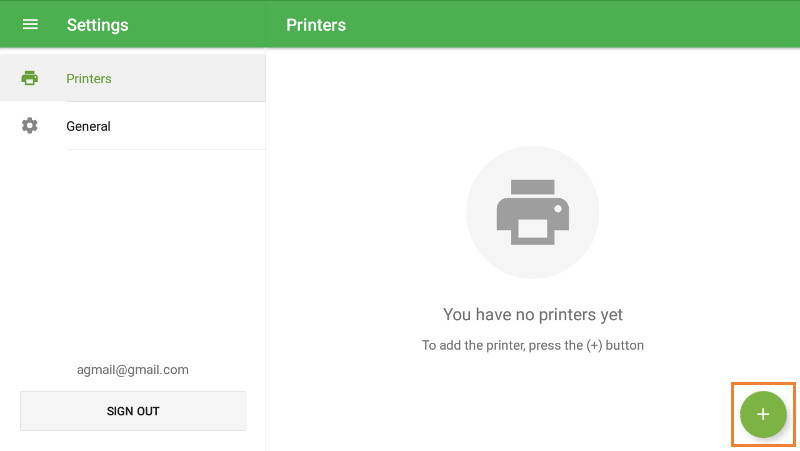
Create a printer by tapping on the ‘+’ button.
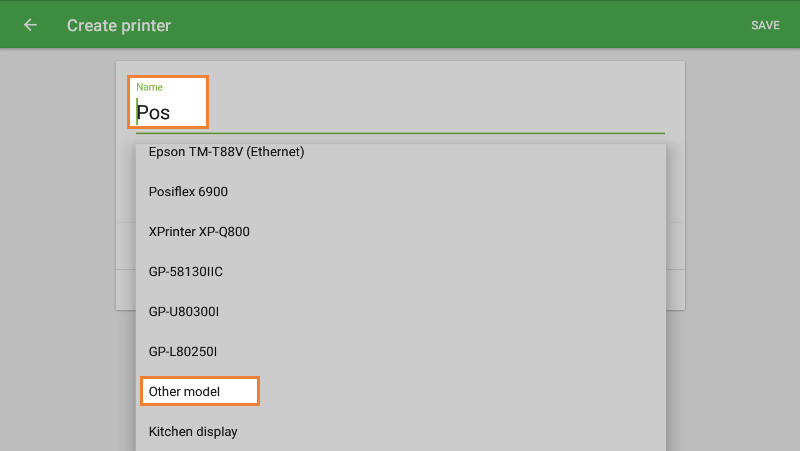
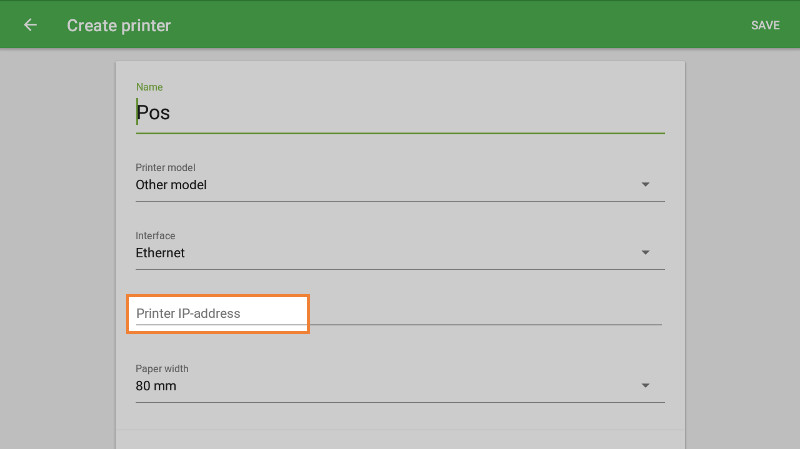
Name your printer in the ‘Name’ field and select ‘Other model’ from the drop-down list of printer models.
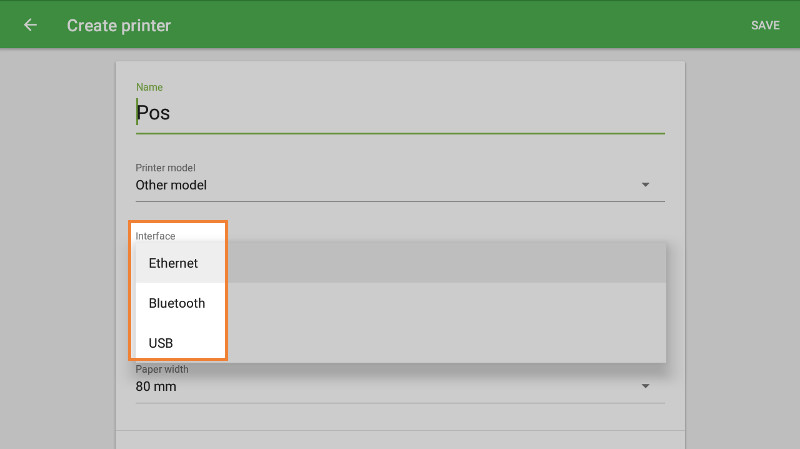
Select your printer interface in the ‘Interface’ field.
For Ethernet printer, fill in the ‘Printer IP-address’ field, which can be found in your printer's network configuration report (details: Troubleshooting When Setting Up an Ethernet Printer)
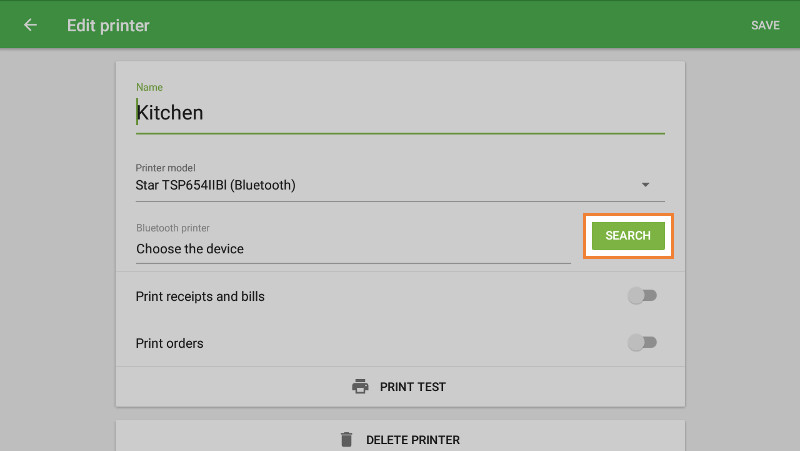
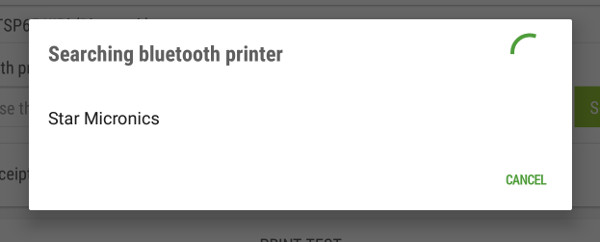
For Bluetooth printer, tap the ‘Search’ button to search for your printer, and select your printer in the following pop-up window.
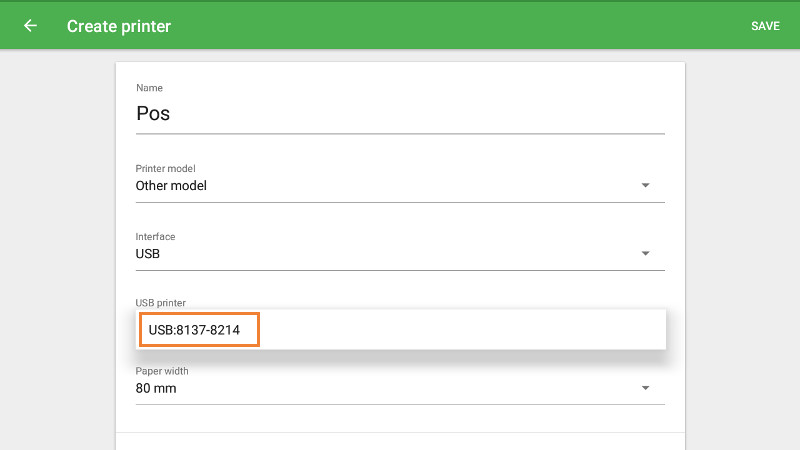
For USB printer, select your printer from the drop-down menu. USB Printers are named in USB: VID-PID format. VID stands for Vendor ID, and PID is the Product ID.
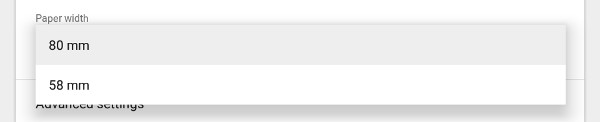
Choose the paper width of your printer.
Tap the ‘Print test’ button to check your printer’s connection with the Loyverse POS app.
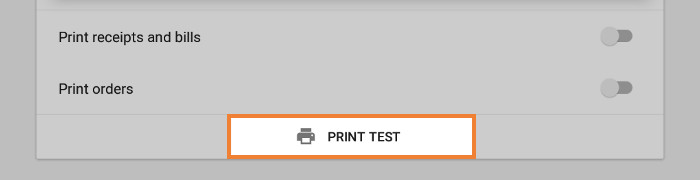
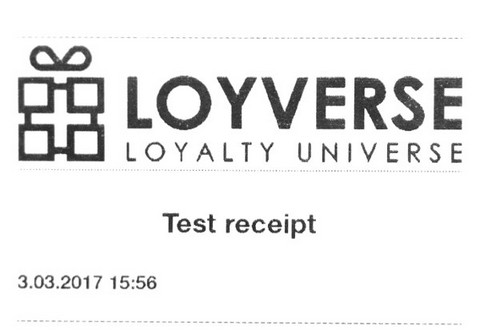
If a test receipt prints out successfully, then your printer is set up correctly.
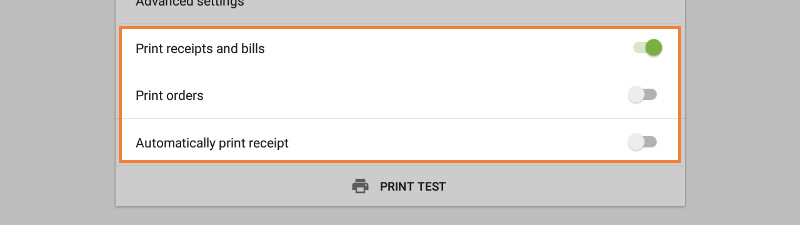
Сhoose the settings for your printer depending on how you want to use it. Don't forget to save all settings at the end by tapping the ‘Save’ button.
Now you can see your printer on the list. You are ready to start selling and printing receipts or orders.

See also:
How to Set Up an Ethernet Printer in Loyverse POS