1. Creating and Setting Up Variants
2. Editing Variant Details
3. Variants in the POS and Reports
4. Importing and Exporting Variants
The Variants feature allows you to manage items that come in multiple versions (such as different sizes, colors, or materials) without creating each one as a separate item. This helps you simplify your item list and makes management more efficient.
1. Creating and Setting Up Variants
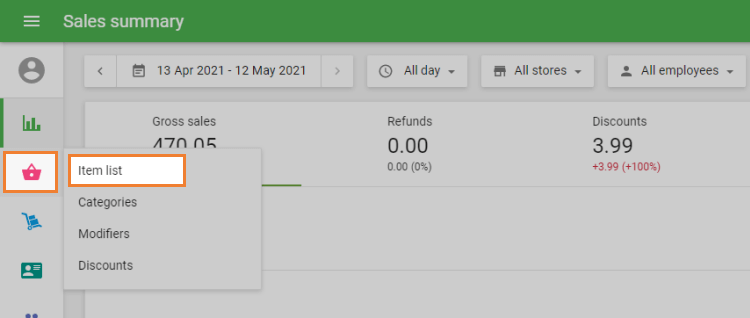
Go to the Item list in the Back Office.
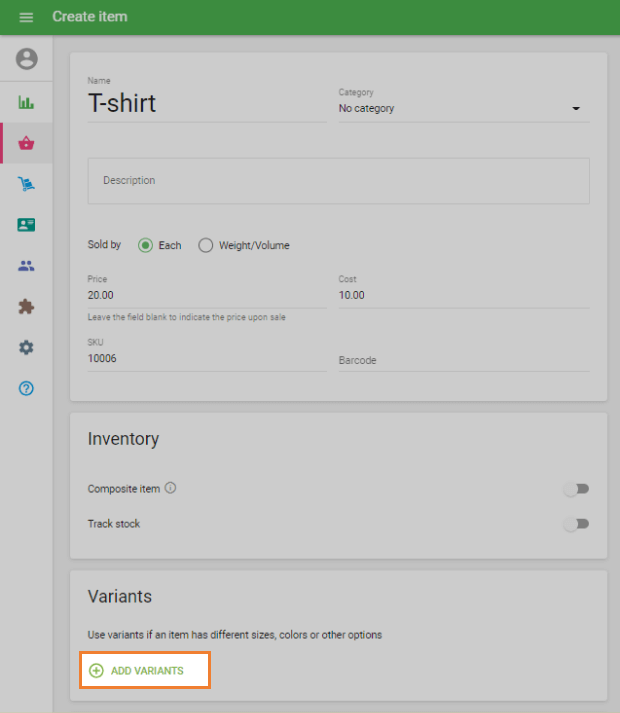
Open an existing item for editing, or create a new one.
In the Variants section, click Add variants.
Enter the Option name (e.g., Size or Color) in the left field.

Enter the Option values (e.g., Small, Medium, Large or Red, Blue, Green) in the right field.
- Press Enter after each value to confirm.
To add more options, click Add option.
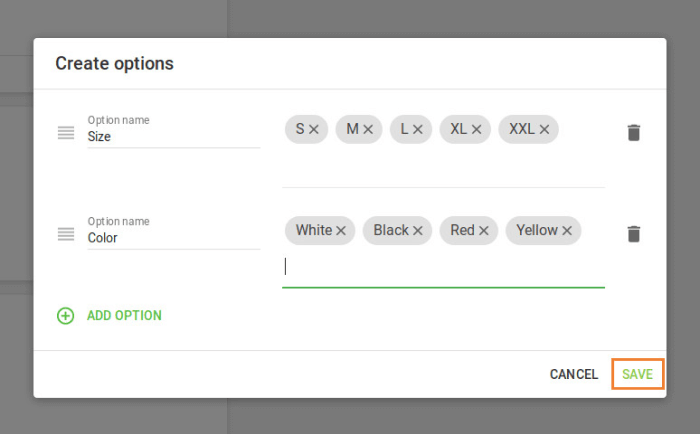
- You can create up to 3 options per item.
Save your changes.
The system will automatically generate all possible combinations of options as separate variants.
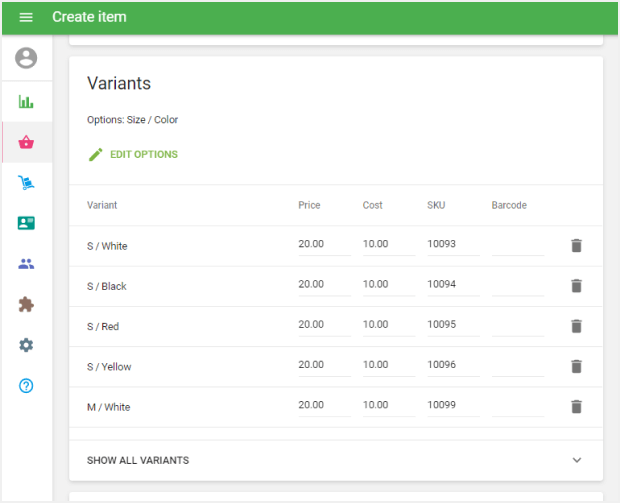
Each item can have up to 200 variant combinations.
2. Editing Variant Details
Price and Cost: Automatically copied from the parent item, but can be adjusted individually for each variant.
SKU: Generated automatically, but you can assign your own unique SKU.
Barcode: You can add a barcode for each variant.
Multi-store settings: If you have multiple stores, you can set variant-specific price, stock, and low stock alerts for each store.
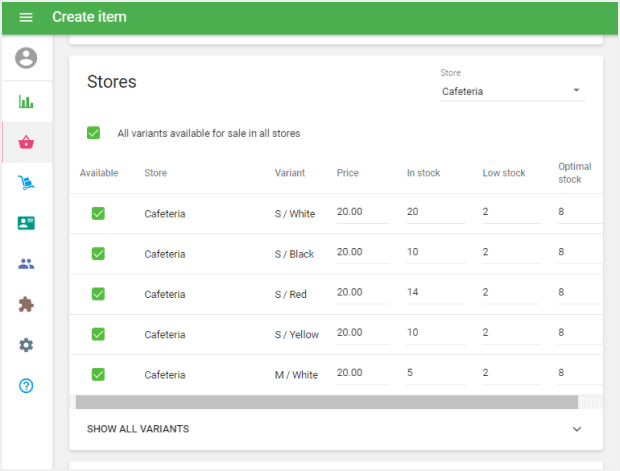
Don’t forget to save the item after making changes.
3. Variants in the POS and Reports
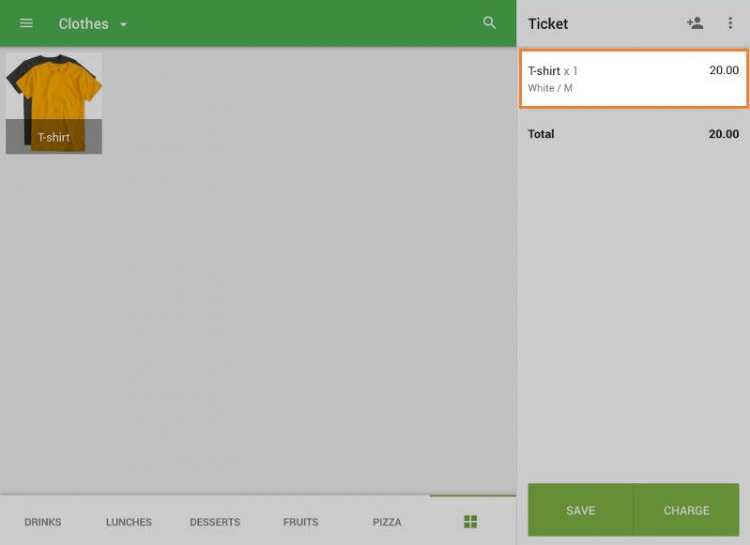
On the POS app, when you select an item with variants, a dialog will appear where you can choose the desired variant.
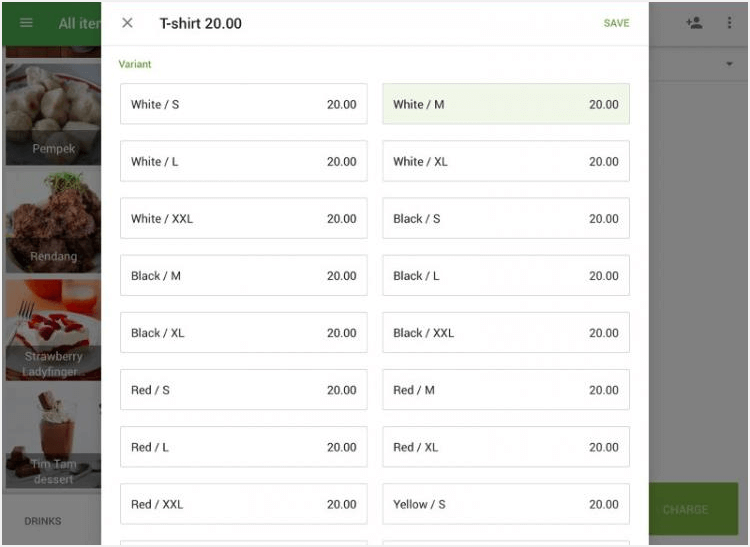
The selected variant will then be added to the ticket as a regular item.
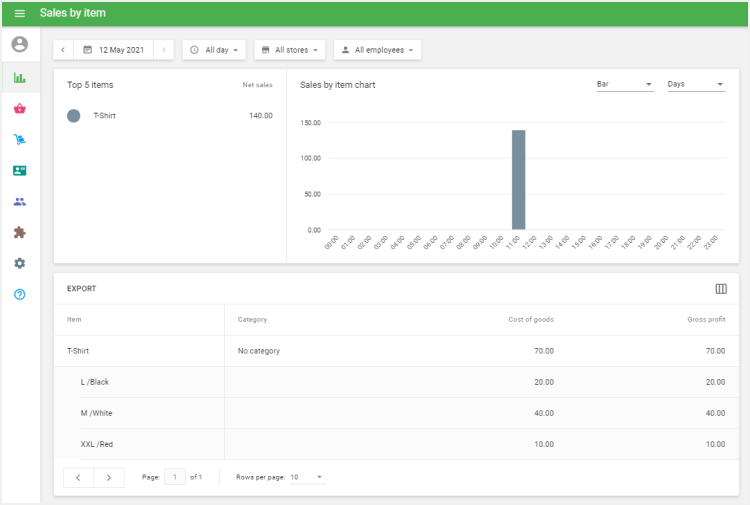
In the Back Office, sales data for each variant can be viewed in Reports → Sales by item.
4. Importing and Exporting Variants
You can manage variants not only through the Back Office interface but also using Import/Export via CSV files.
Go to the Item list in the Back Office.
Use the Export button to download your items file.
Open the CSV file. You will see:
- Each variant combination is displayed as a separate item with its own SKU.
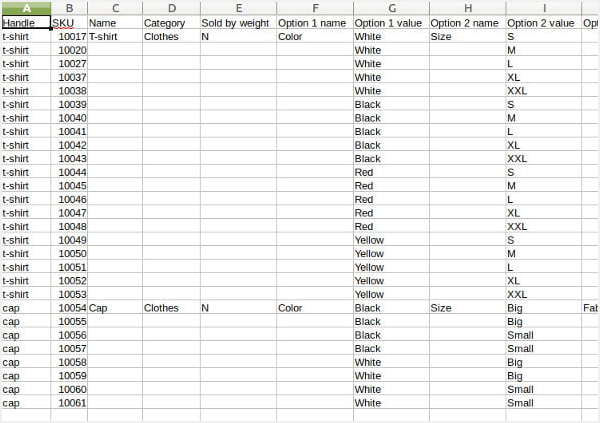
- A shared Handle field for all variants of the same item.
- Common fields are filled only for the first variant; the rest are left blank.
⚠️ If you enter different values for shared fields across variants, the system will return an error on import.
Up to 3 Option name columns and 3 Option value columns are available. Leave unused ones blank.
When importing new items without variants, leave the Handle field blank, and the system will generate it automatically.
After editing, re-import the file into the Back Office.
Using Variants makes it easier to manage products with multiple versions and keeps your item list clear and organized.
See also: