1. How to Create a New POS
2. How to Activate a POS
3. How to Deactivate a POS
4. How to Delete a POS
Properly managing your POS (Point of Sale) devices ensures smooth operations and secure access to your Loyverse system. Here’s a step-by-step guide to help you manage POS devices in the Back Office.
Who Can Manage POS Devices?
Only the account owner or employees with the ‘Manage POS devices’ access right can perform these actions.
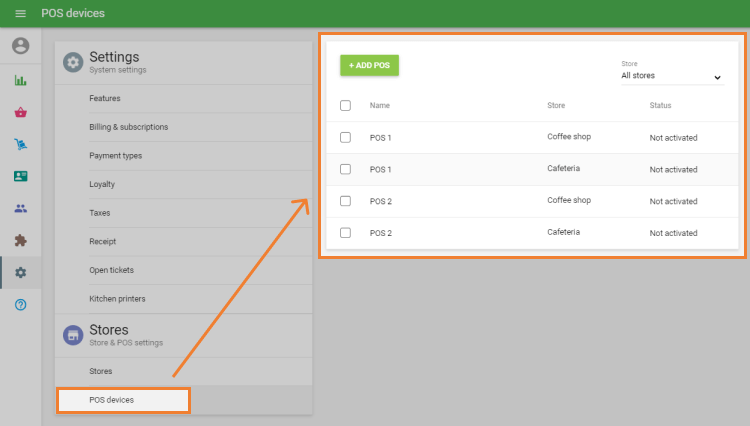
1️. How to Create a New POS
To add a new POS device:
1. Log in to the Back Office.
2. Navigate to the ‘POS devices’ section under Settings.
3. Click the ‘Add POS’ button.
4. In the ‘Create POS’ form:
- Enter the POS Name.
- Select the Store where this POS will be used.
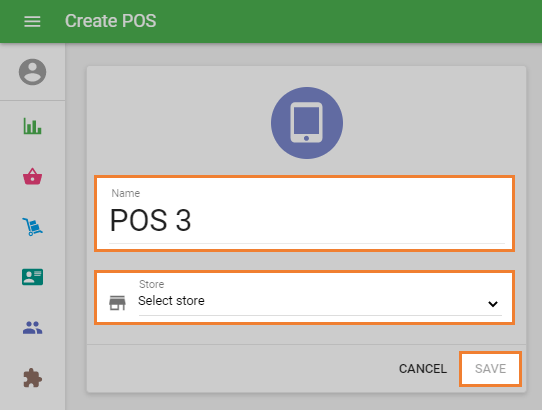
5. Click ‘Save’.
Your new POS will now appear in the device list with the status ‘Not Activated’.

2️. How to Activate a POS
To activate your newly created POS:
1. On your mobile device, open the Loyverse POS app.
2. Log in using the email and password of the account owner or an authorized employee.
3. Choose the POS.
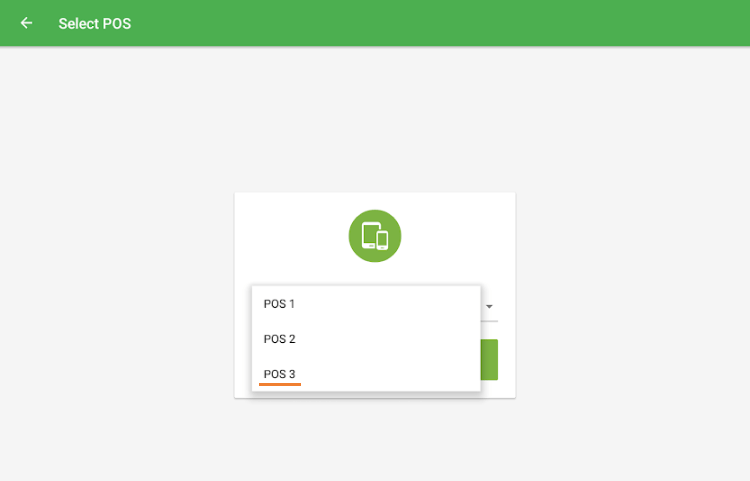
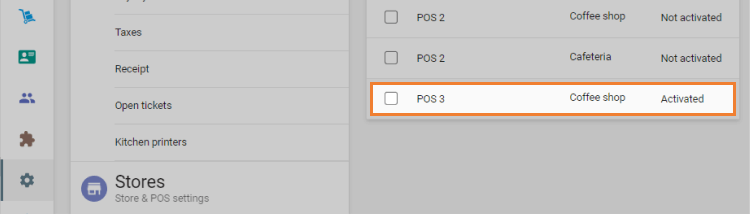
After login, the POS will automatically be activated, and its status in the Back Office will change to ‘Activated’.
You can then switch the user to another employee from within the app if needed.
3️. How to Deactivate a POS
Deactivation may be necessary in cases such as:
- The device is lost, broken, or replaced.
- You need to log in to a new device using the same POS slot.
Important: Deactivating a POS will result in the loss of all unsynced sales data on the device.
To deactivate a POS:
1. In the ‘POS devices’ list, click to edit the activated POS.
2. Click the ‘Deactivate’ icon next to the Status field.
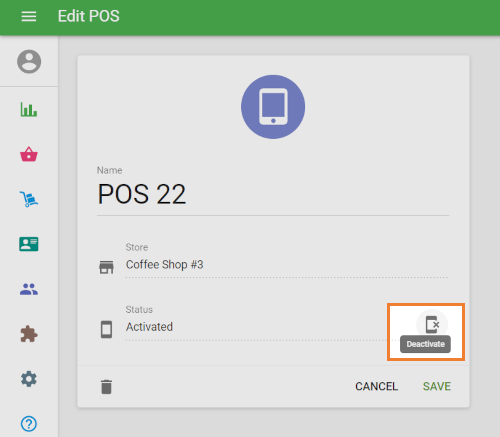
3. Confirm the action by clicking ‘Deactivate’ in the popup.
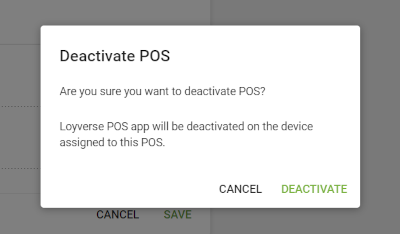
The POS status will now return to ‘Not Activated’, and you can log in with this POS on a new device.
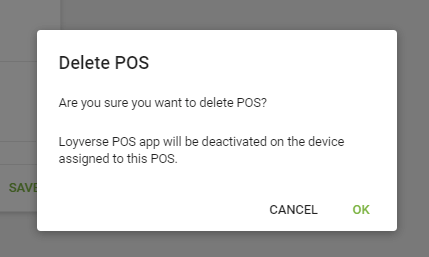
4️. How to Delete a POS
⚠️ Before deleting a POS, ensure:
- All open tickets are closed.
- The shift is closed on the POS device.
- All receipts are synced with the Back Office.
To verify that all data is synced:
1. Go to the ‘Receipts’ section in the Back Office.
2. Check the list of receipts.
3. Click on each receipt to view the details and confirm the POS name.
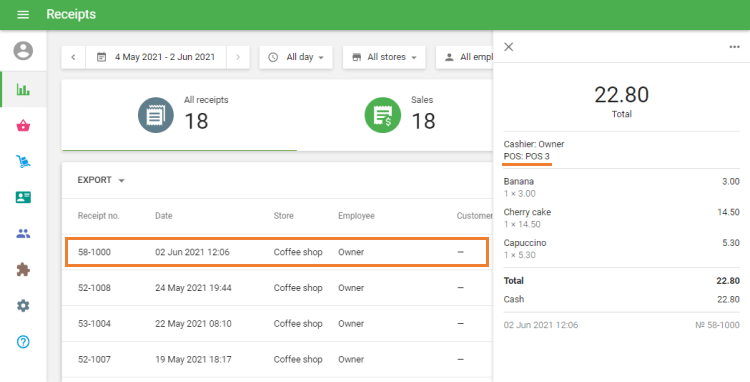
If some receipts are missing, connect your mobile POS device to the internet to complete synchronization.
To delete the POS:
1. In the ‘POS devices’ section, find the device and click Edit.
2. Click the trash bin icon to delete.
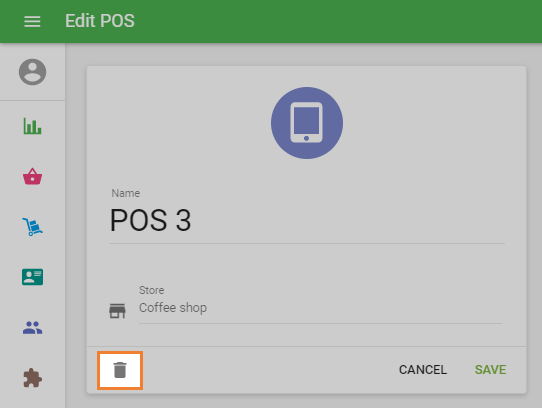
3. Confirm the action in the popup by clicking ‘OK’.
All synced receipts from the deleted POS will remain in your Back Office reports.
After deletion, the POS will no longer be usable on the device.
See also:
Setting Up Your Shop in Loyverse Back Office
How to Switch User Account to Different Employee in the Opened Loyverse POS