You can configure whether customer information and comments appear on client-facing receipts, such as printed or emailed receipts. These settings do not affect internal receipts stored in the POS or Back Office, where all customer data and comments are always visible.
Setting Up in the Back Office
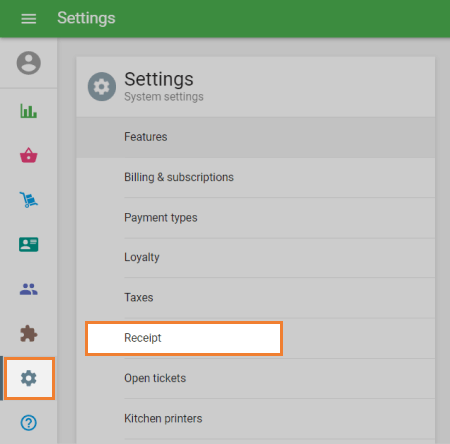
Log in to the Back Office and go to the ‘Settings’ menu.
Select the ‘Receipt’ section.
You will see two relevant options:
- Show customer info: Enable this to display the customer’s name, phone number, and address (if filled in) on printed and email receipts.
Show comments: Enable this to include both ticket comments and individual item comments on receipts.
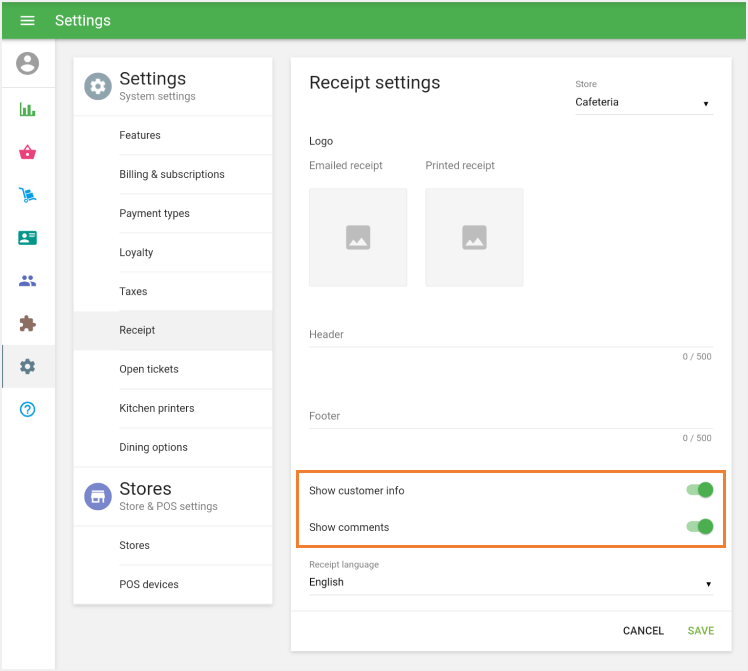
Don’t forget to click ‘Save’ after making changes.
Multi-Store Consideration
If you manage multiple stores, these settings must be configured separately for each store:
Use the store selector at the top of the Receipt settings page.

- Repeat the configuration and save changes for each store.
Adding Customer Information During Sale
To display customer details on the receipt:
Tap the ‘Add client’ icon during a sale.

- Select or create a customer. The receipt will then include their name, phone number, and address (if available).
Adding Comments
You can add comments to both tickets and individual items:
To add a ticket comment:
- Tap the menu (⋮) on the ticket header.
Select ‘Edit ticket’.
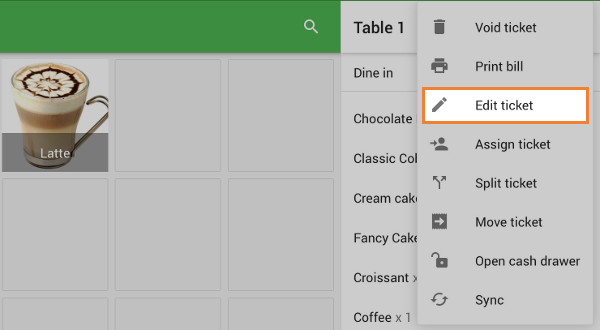
Type your comment in the popup window and tap ‘Save’.
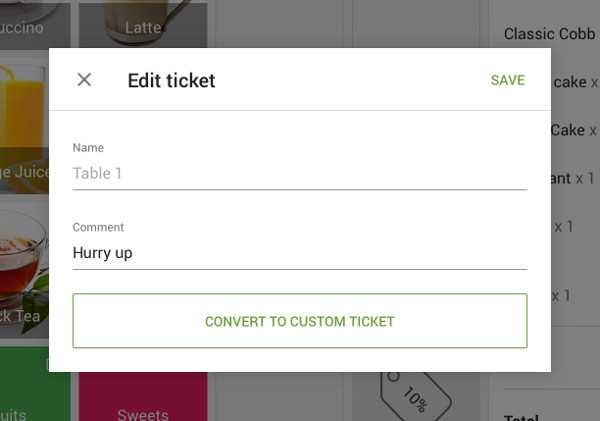
To add an item comment:
- Tap the item in the ticket.
Enter the note in the ‘Comment’ field in the popup.
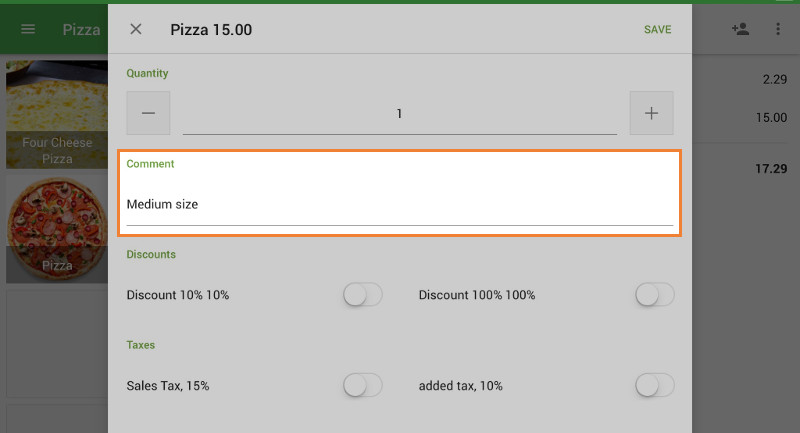
- Tap ‘Save’.
What Will Appear on the Customer’s Receipt
If enabled in settings, the following will be printed or emailed on the customer’s receipt:
- Customer name, address, phone number
- Ticket-level comment
- Item comments
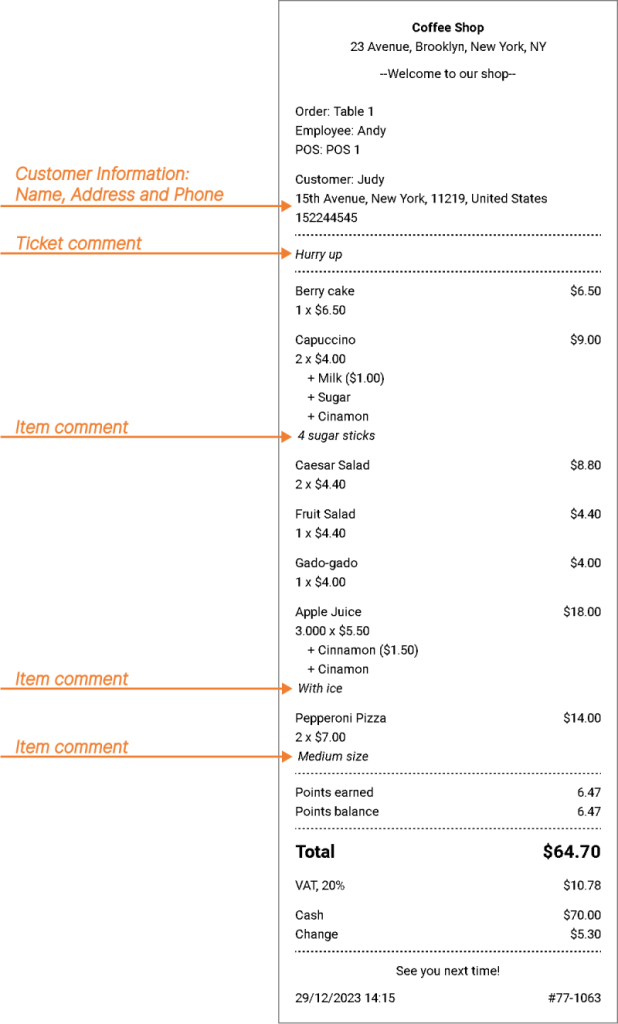
Note: All these details also appear on the refund receipt, if a refund is processed for the transaction.
See also: