1. Trial period
2. Activating Subscriptions
3. Adding a Payment Method
4. Billing details
5. Payments for Subscriptions
6. Unsubscribing from Services
7. Locked Back Office
8. Subscription Changes and Credits
Loyverse POS offers paid services to enhance your business operations, including subscriptions to: Unlimited Sales History, Employee Management, and Advanced Inventory. This guide will walk you through starting free trials, activating subscriptions, managing payment methods, and unsubscribing if needed.
1. Trial Period
All paid services come with a 14-day free trial. No credit card is required to start the trial.
How to Start a Trial:
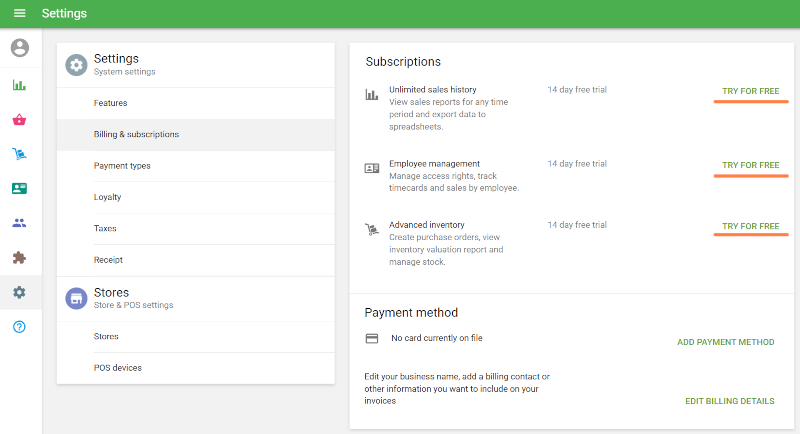
- Log in to your Back Office.
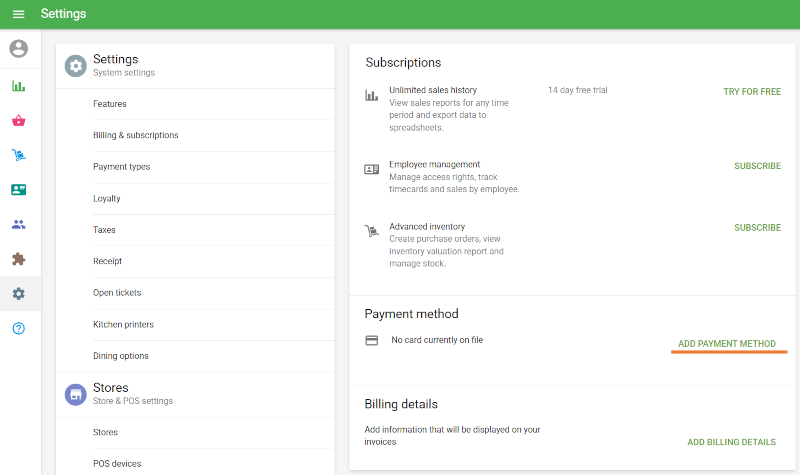
- Navigate to Settings > Billing & Subscriptions.
- Click the ‘Try for free’ button for Unlimited Sales History, Employee Management, or Advanced Inventory.
Service-Specific Notes:
- Unlimited Sales History: A terms and conditions pop-up will appear. Click ‘Start free trial’ to activate the trial.
- Employee Management: Add employees in the Employees list and agree to the terms to start the trial.
- Advanced Inventory: Click ‘Start free trial’ on the pop-up window to activate the trial.
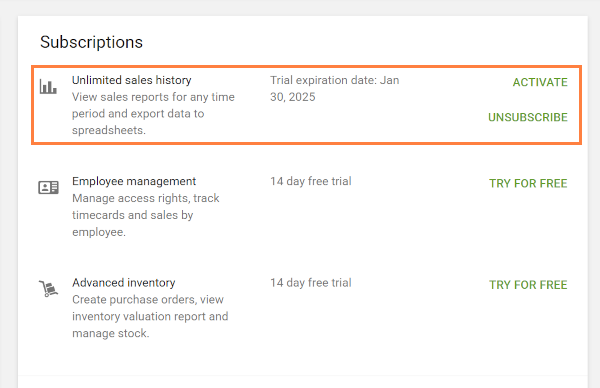
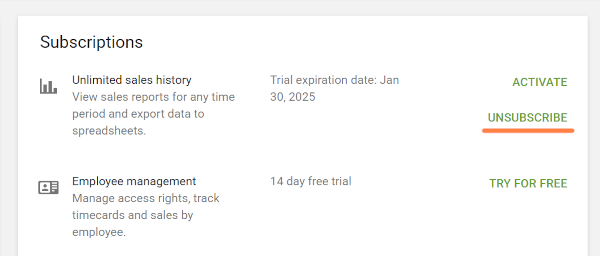
During the trial period, the expiration date will be displayed in the Back Office. You can cancel at any time by clicking the ‘Unsubscribe’ button. The service will remain active until the trial ends, at which point it will be automatically canceled.
2. Activating Subscriptions
You can activate your subscription at any time during the trial (the payment will be taken only after 14 days have passed):
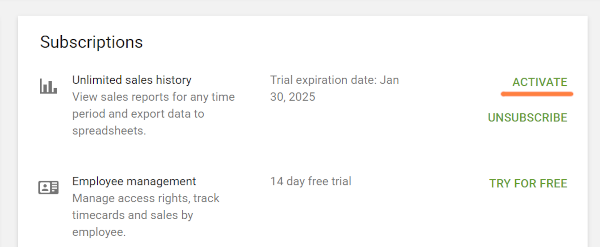
- Go to Billing & Subscriptions in the Back Office.
Click ‘Activate’ for the desired service.
Choose your pricing plan in the pop-up window and click ‘Continue.’
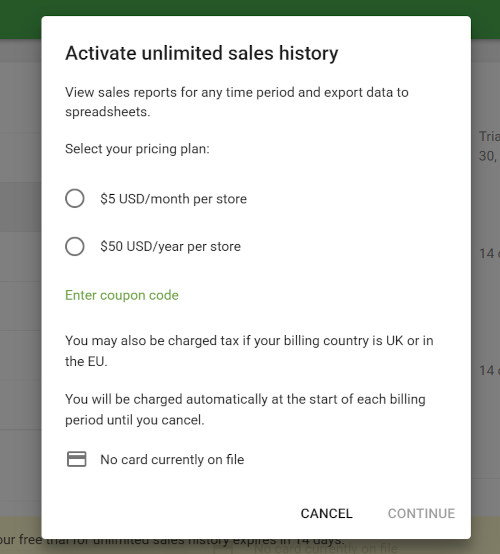
- If you haven’t added a payment method, you’ll be redirected to do so.
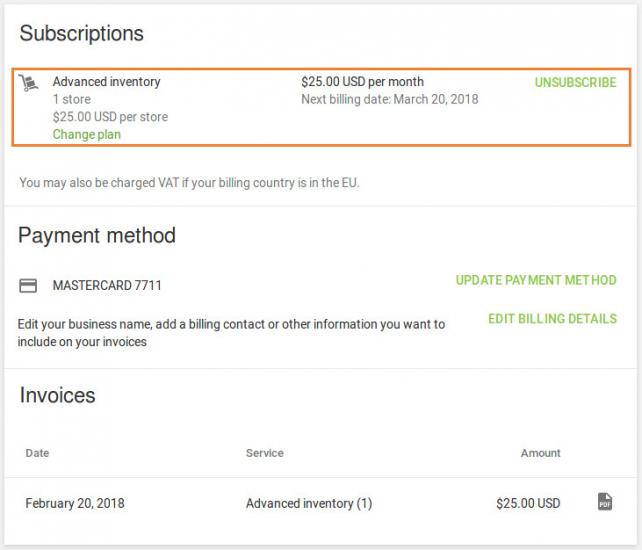
After completing the subscription process, details of your active subscription will appear in the Subscriptions section.
3. Adding a Payment Method
Go to Billing & Subscriptions and click ‘Add payment method.’
Enter your card details in the required fields and click ‘Save.’
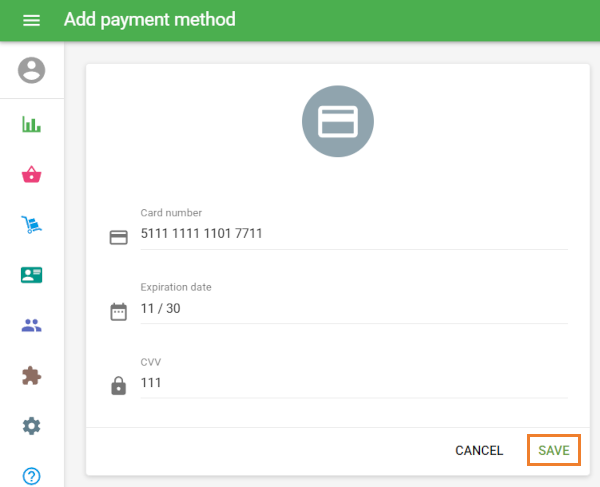
If the information is correct, your card will be added as a payment method.
4. Billing details
Click ‘Add billing details’ to provide details that will appear on your future invoices.
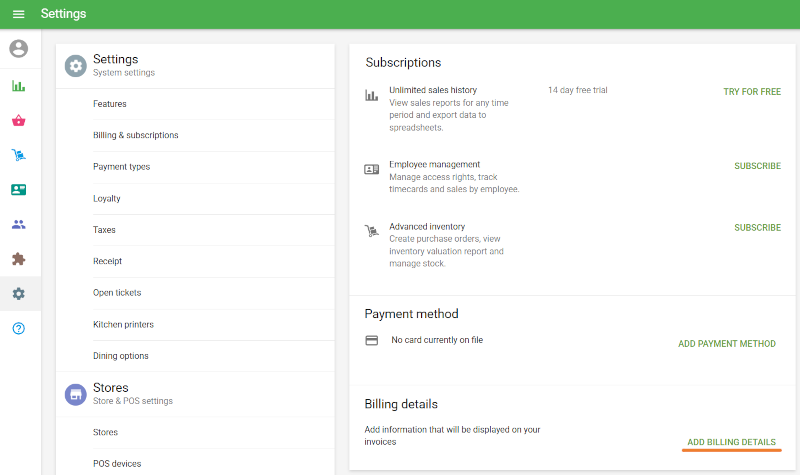
Fill in the legal information of your business.

Note that the Country of business registration refers to the place where your business is located, not the country where the card is issued.
If your business is registered in the UK and EU countries, you have the option to provide VAT number.
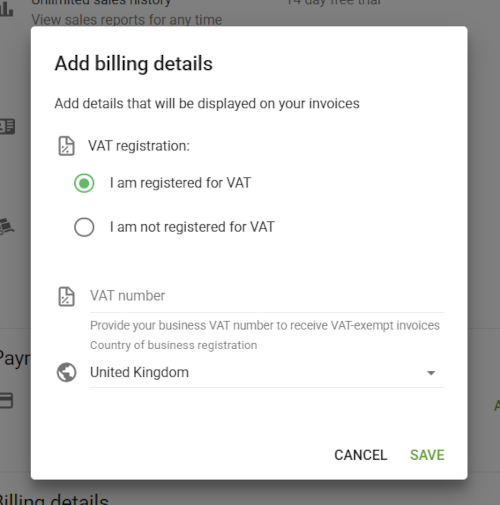
Make sure to save the information.
5. Payments for Subscriptions
Subscription fees will be automatically charged to your saved payment method.
Notifications about future payments, paid invoices, and failed attempts will be sent to the account email address.
Payment history and warnings about failed payments can be found in the ‘Invoices’ section.
Click on the PDF icon to download your invoice.
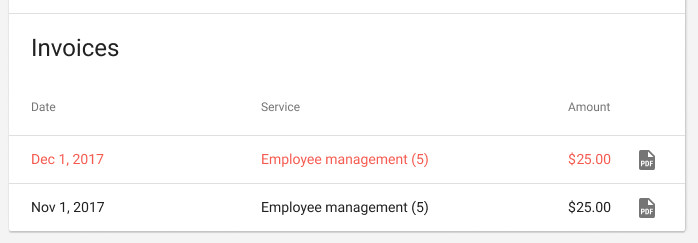
VAT may be applied based on your billing information.
6. Unsubscribing from Services
To unsubscribe, go to Billing & Subscriptions and click ‘Unsubscribe’ for the desired service.
- Employee Management: All employees except the owner will be deleted. Alternatively, you can delete employees manually and pay only for the remaining ones.
- Advanced Inventory: A warning will inform you about losing access to advanced inventory features.
After unsubscribing from Unlimited Sales History or Advanced Inventory, you will continue to have access to these services until the end of the current paid period. If you unsubscribe from Employee Management, prorated credits will be issued to your account and can be used in the future to pay for addons.
7. Locked Back Office
- Trial Users: If no action is taken after the trial ends, the Back Office will lock immediately. You need to subscribe or cancel the trial to unlock it.
- Subscribed Users: If an invoice is unpaid, you’ll have 7 days of access before the Back Office is locked.
Even in a locked state, you can access the Stores, POS Devices, or Employee list sections to manage or delete stores or employees.
8. Subscription Changes and Credits
- If you reduce the number of employees or stores, or unsubscribe mid-cycle from the Employee management, unused amounts will be credited to your Loyverse POS account for future use.
- Switching from the annual to the monthly plan will take effect after the current annual billing period ends.
- If you opt to switch from the monthly to the annual plan, you will receive a prorated credit reflecting the remaining billing period of your monthly subscription. This credit will be applied to partially cover the invoice amount for your annual plan.
By following these steps, you can easily manage Loyverse POS’s paid services to suit your business needs.