Printing Labels is a part of the Advanced inventory management and is available only to those users who have subscribed to this functionality.
Labels are used to mark the items in the store. The label can contain the item’s name, SKU, price, and barcode. Labels with a barcode allow you to use the scanner to add items to the ticket.
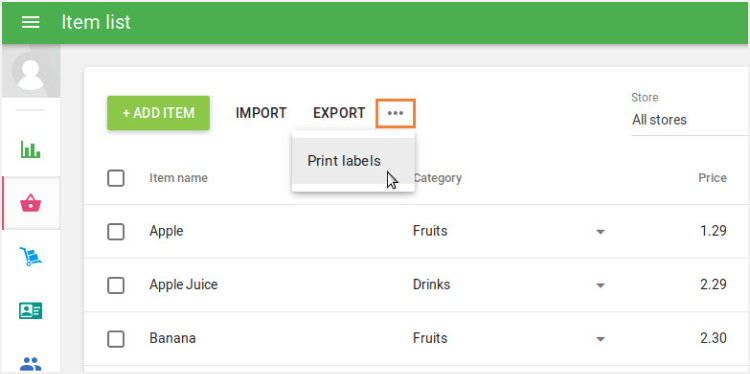
Go to the 'Item list' menu in the Back Office.
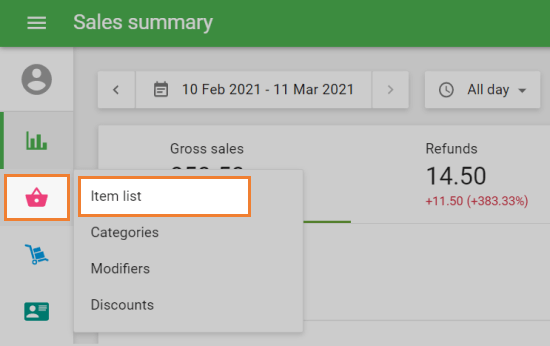
Click on the ‘Print labels’ button at the three dots menu.
The form ‘Create labels’ will open for editing.
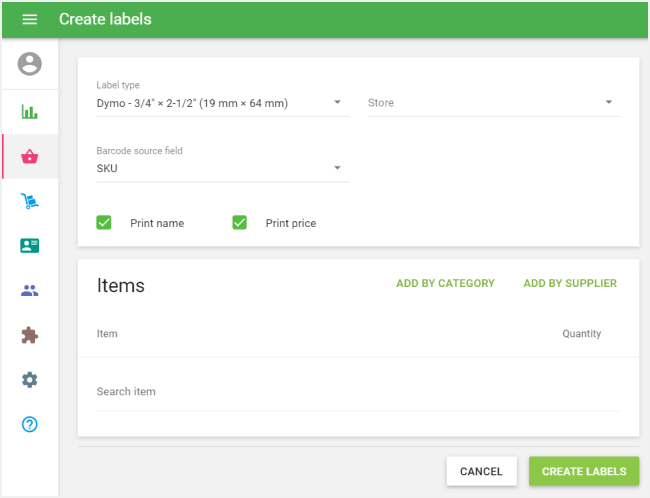
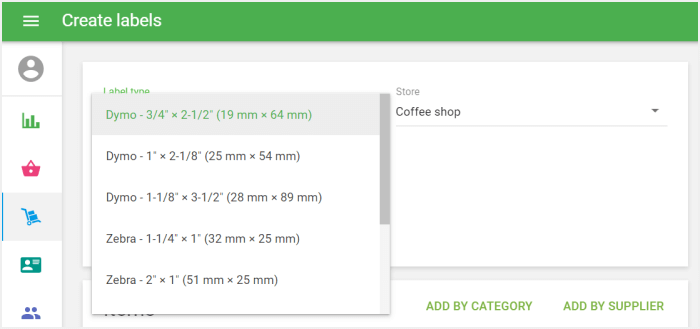
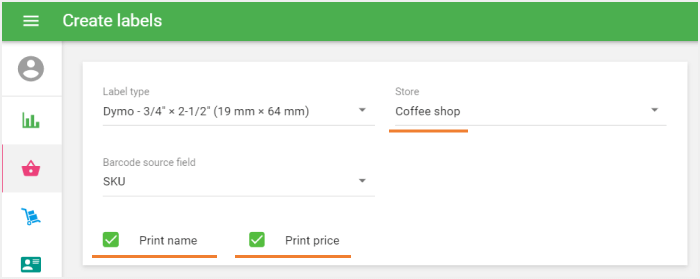
Select a ‘Label type’ from the drop-down list of predefined printing templates.
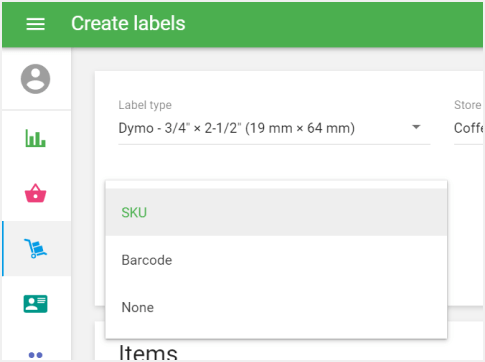
Select a ‘Barcode source field’ from the drop-down list of fields: SKU, Barcode, or None. In case of choosing ‘None’, the labels will not have a barcode.
Choose ‘Store’ from the drop-down list of your stores, for which you are going to print labels. Select ‘Print name’ and ‘Print price’ boxes if you want them printed on your labels. The label will contain the price of the items from the selected store with the currency symbol or name defined in the account settings.
The system will remember your choice and suggest these parameters as default the next time.
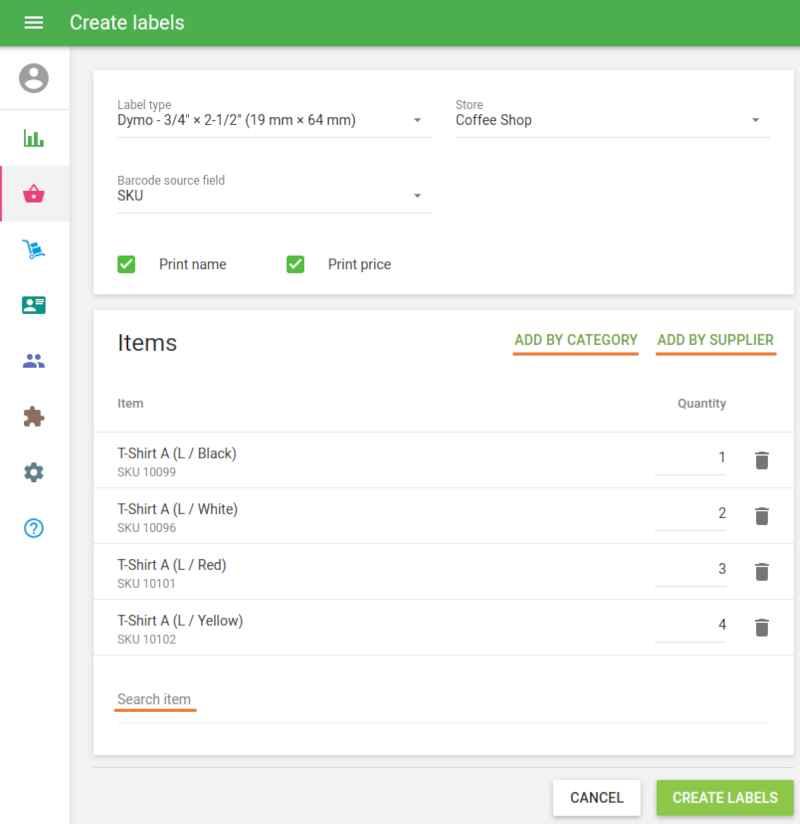
In the ‘Items’ section, create a list of your items for which you are going to print labels. You can add items to the list one by one in the ‘Search Item’ field, or you can add a whole category by clicking on the ‘Add by category’ button, as well as adding all items assigned to a certain supplier by clicking on the ‘Add by supplier’ button.
Fill in the ‘Quantity’ column with the number of labels you want to print. Then click ‘Create labels’.
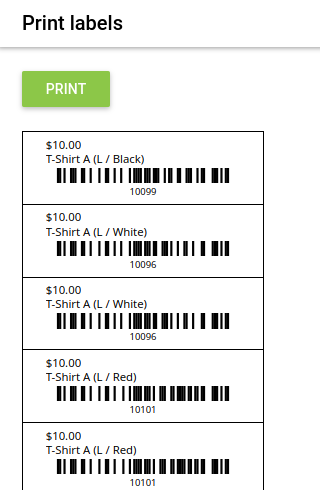
The generated HTML page with labels will open in a new tab of the browser. You can print the labels on your printer by clicking on the ‘Print’ button.
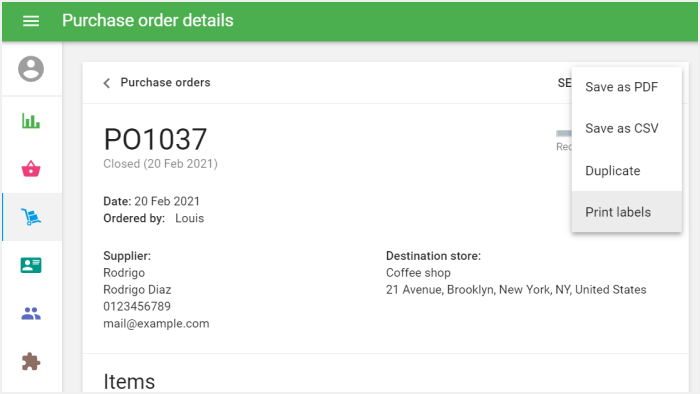
In the same way, you can print labels from the Purchase order, Transfer order, or Stock adjustment documents.
Open your document and click ‘Print labels’ in the ‘More’ menu.
The ‘Create labels’ window will open with the items from the document.
The system will automatically fill in the quantity of labels based on the quantity of items in your document. But you can correct the quantity of labels for each item or remove items that do not need labels.
Note: The maximum length of a barcode is 80 characters, but for better visualization on small labels, the optimal number of characters is no more than 18 characters.
Barcode format on the generated labels is Code-128, which supports digits 0-9 and Latin letters A-Z and a-z.
See also:
Advanced Inventory Management Overview
How to Work with Purchase Orders and Suppliers
How to Work with Transfer Orders
How to Work with Stock Adjustments
Inventory History and Valuation Report