1. Suppliers
2. Making purchase orders
3. Actions with the purchase order
‘Purchase orders’ is a part of the ‘Advanced inventory management’ option and allows you to create and save orders for the supply of products, send orders to suppliers, receive products, and save information of suppliers in the system. These options are available only to those users who have subscribed to this functionality.
1. Suppliers
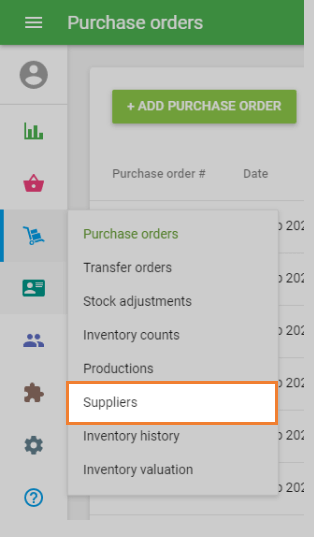
Go to ‘Suppliers’ section in the ‘Inventory management’ menu.
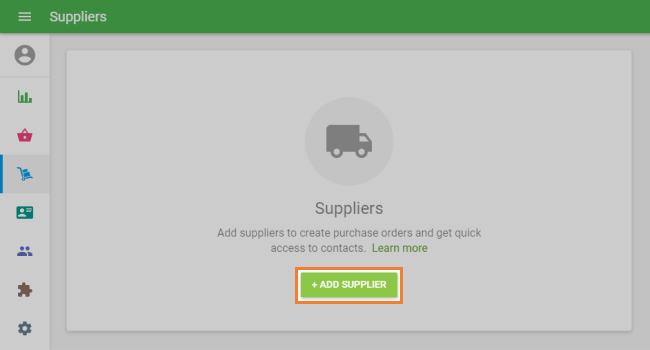
To create a supplier, click ‘+ Add supplier’ button.
In the ‘Create supplier’ form, ‘Supplier's name’ is a required field and should be unique. The other fields are optional and can be left blank, but remember, that this information will be used to create the Purchase Order in the next step.
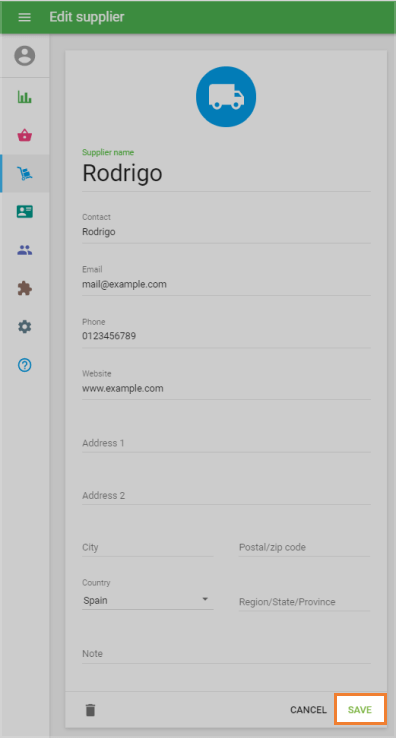
Don't forget to save suppliers.
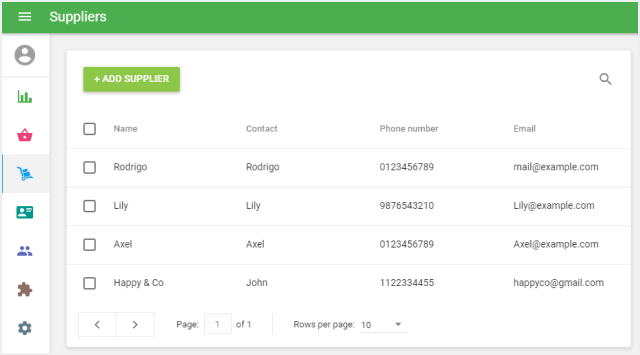
After you have created a list of your suppliers, you can start making purchase orders.
2. Making purchase orders
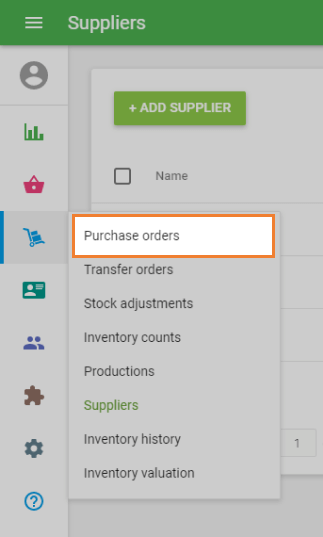
Go to ‘Purchase orders’ section in the ‘Inventory management’ menu.
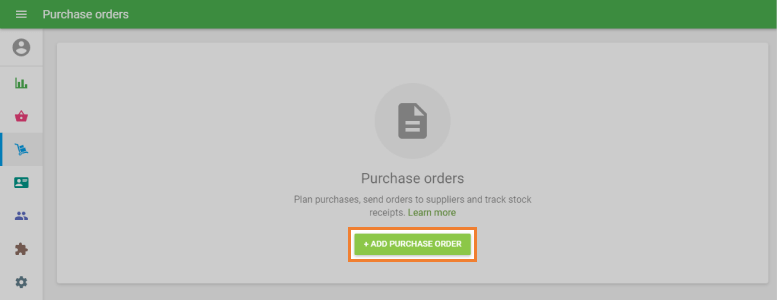
To create an order, click on ‘+ Add purchase order’ button.
The form ‘Create purchase order’ will open for editing.
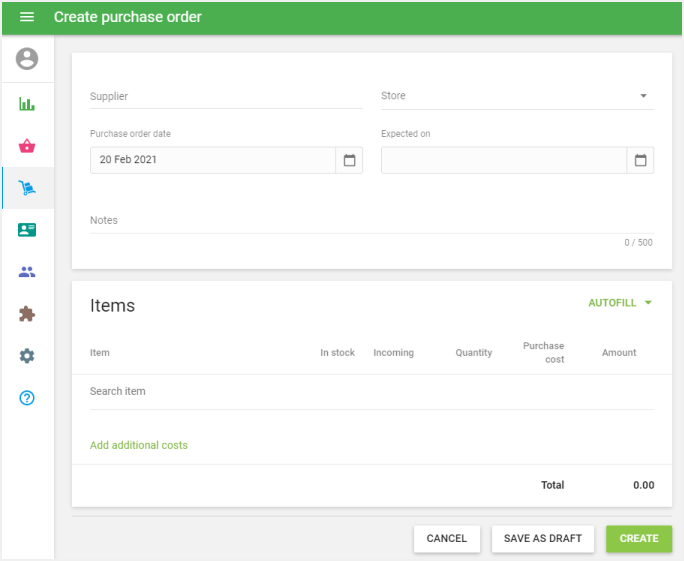
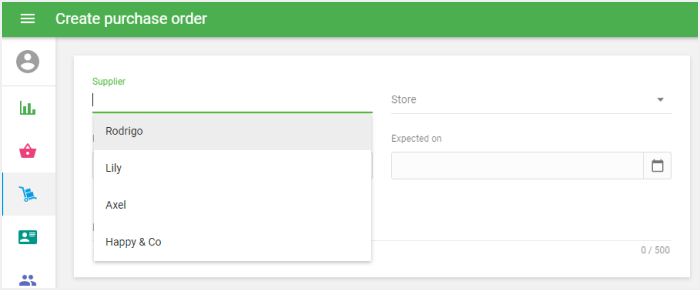
Choose the supplier from the 'Supplier' drop-down list.
You can set the ‘Purchase order date’ to the date you want the order to be put in. You can also set the date you expect your order to arrive in the ‘Expected on’ field and make notes for your order in the ‘Notes’ field.
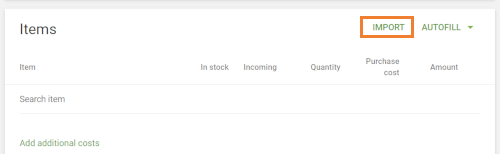
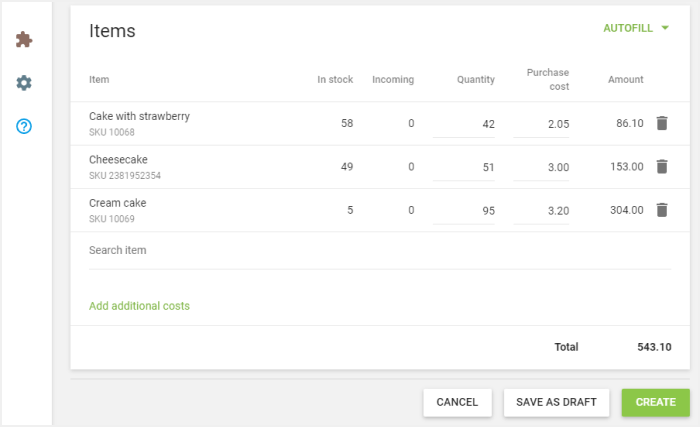
In the ‘Items’ section, you can add items from the list of your items. If you click on the field, a drop-down list of your items will appear, and you can type in the item’s name, SKU or barcode to find the desired item.

Fill in the ‘Quantity’ and the ‘Default purchase cost’.
You can add more items to the order in the same way as above.
The ‘Incoming’ fields indicate the expected quantity of items to be received based on all existing purchase orders but have not yet been received.
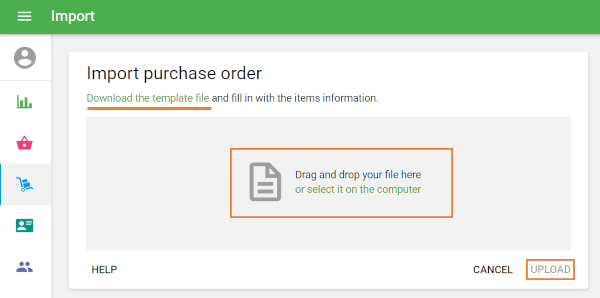
You can also import the items to the purchase order. For this, click on the Import button.
On the Import purchase order page, you can download the template CSV file to your computer. Then, fill it with the item's parameters such as SKU, Item name, Variant name, Quantity, and Purchase cost. Parameter SKU or Item name is required. Others are optional. After that, select the CSV file from your computer and click ‘Upload’.
After forming the list of items and their parameters, click on the ‘Create’ button to make a purchase order, or save it as a draft for further corrections.
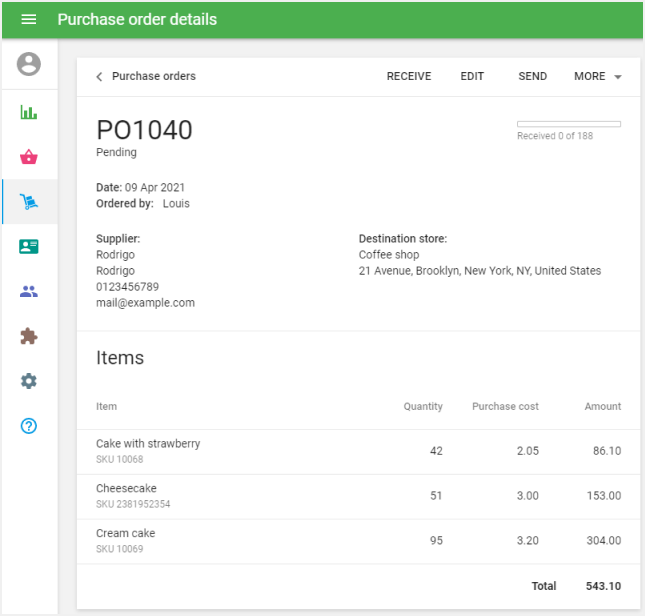
Now your purchase order has been created.
3. Actions with the purchase order.
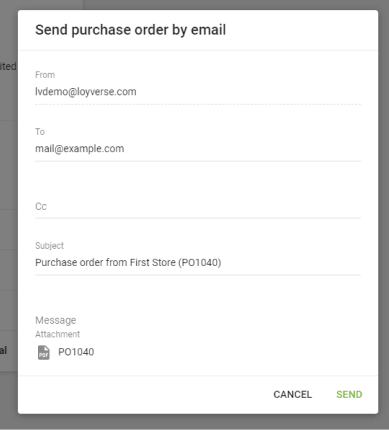
You can send your purchase order to your supplier. Click on the ‘Send’ button at the top. Fill out the email form and click the ‘Send’ button at the bottom. The purchase order will be sent to your supplier as an attached file.
To edit the order, click on the ‘Edit’ button at the top.
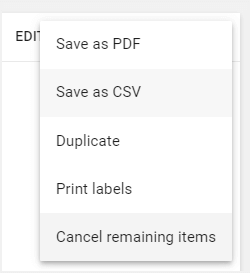
There are additional operations available with the purchase order in the ‘More’ menu.
To confirm receiving an order, click on the ‘Receive’ button at the top.
You can put the number of items ‘To receive’ or ‘Mark all received’ and click on the ‘Receive’ button.
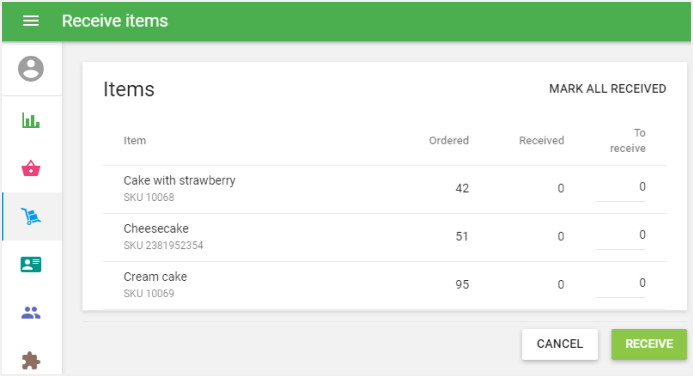
Afterward, the stock of the received items will be updated according to the supplied amount. Also, the value of the average cost for each received item will be updated based on the ‘Default purchase cost’ specified in the order.
Purchase orders can have 4 different statuses: Draft, Pending, Partially received, and Closed.

See also:
Advanced Inventory Management Overview
How to Work with Transfer Orders