In the Loyverse POS app, you can manually add and edit customer profiles. However, if you need to add or update a large number of customers, the import and export functions in the Back Office make the process faster and more convenient.
Exporting Customers
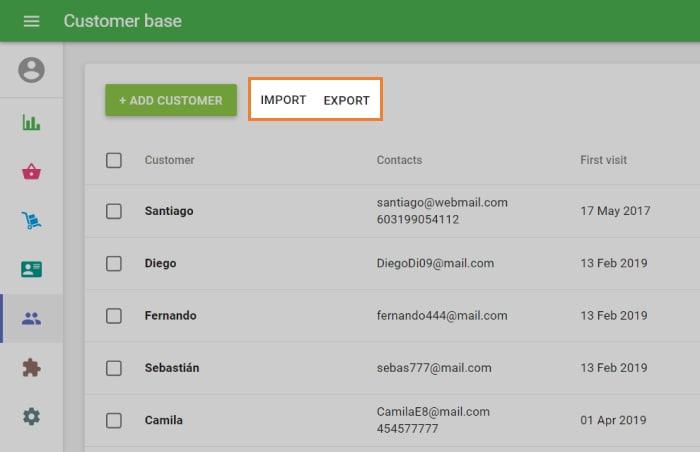
Open the Back Office and go to the Customers menu.
Click the Export button at the top of the customer list.
Confirm the download dialog and save the file to your computer.
You can now open this file, review or edit your customer list, and later re-import it into the system.
Importing Customers
In the Customers menu, click the Import button.
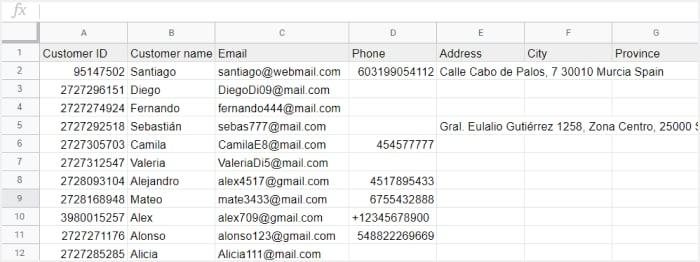
If you are importing new customers, download the template file provided by Loyverse.
Open the file and enter customer details in the specified columns.
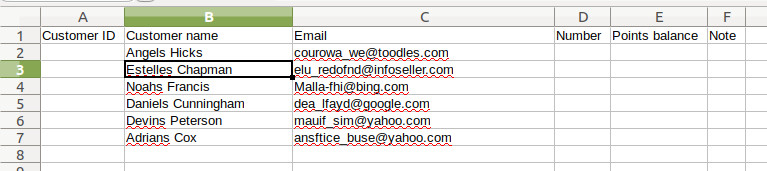
- If some data is unavailable, you may leave the cell blank.
- Do not remove or rearrange the column headers in the first row.
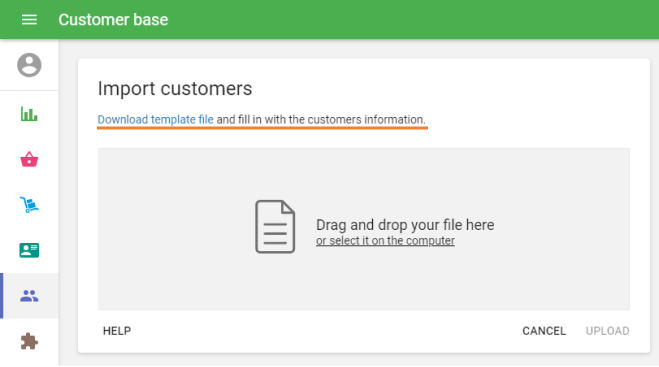
Save the file and return to the Import customers window.
Drag and drop your file into the upload area, or select it manually from your computer.
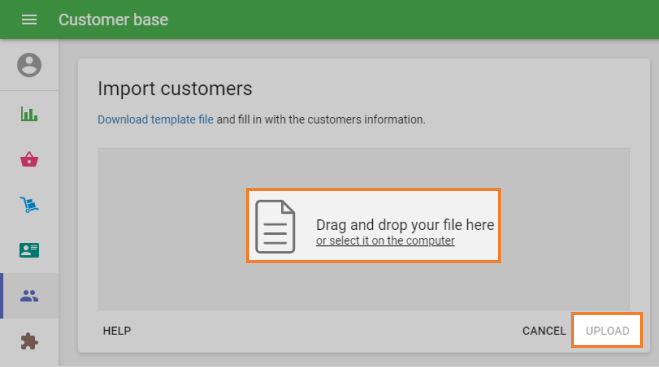
- Click Upload to start the import.
A confirmation window will appear with a summary of the upload and any warnings.
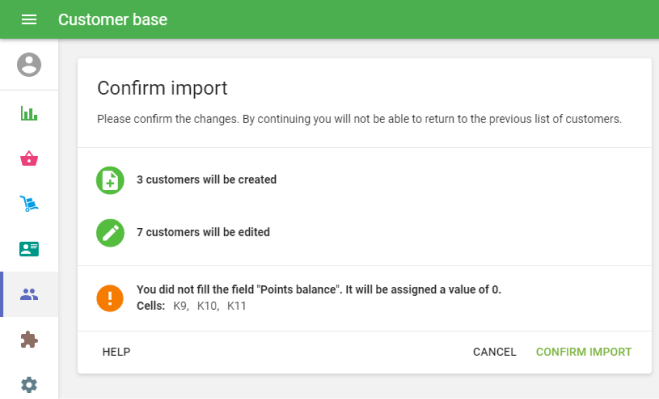
After confirming, your customer base will be updated with the new entries and any modifications to existing customers.
Important Notes
- The email address is the main identifier for each customer. Two customers cannot share the same email address.
- If you edit an existing customer’s row in the file (keeping the same email), the system will update that customer’s information.
- Employees with access rights to manage customers in the Back Office can perform import and export actions.
Using import and export saves time and ensures your customer base is always accurate and up to date.
See also: