1. Configuration
2. Creating Open Tickets
3. Editing Open Tickets
The Predefined Open Tickets feature allows you to quickly assign preset names—such as Table 1, Table 2, etc.—to open tickets. This is especially useful for cafes and restaurants working with table service.
Before using this feature, make sure the Open tickets option is enabled in your Back Office.
1. Configuration
Log in to your Back Office.
Go to Settings → Open tickets.
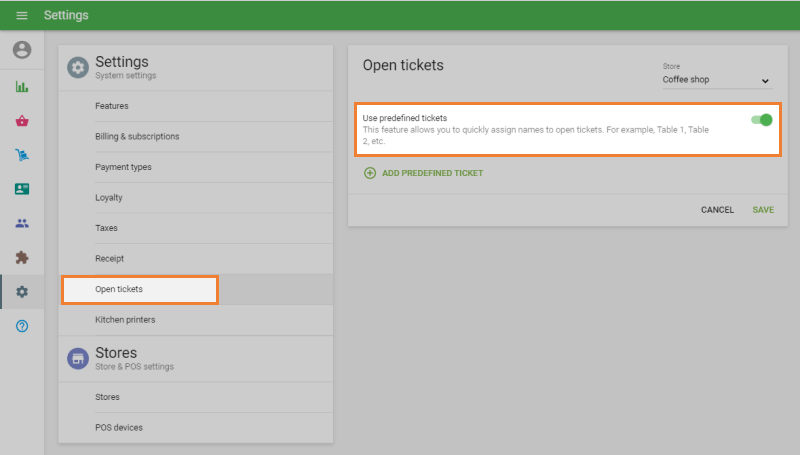
Enable the Use predefined tickets option.
You can now create predefined ticket names:
- Click Add predefined ticket.
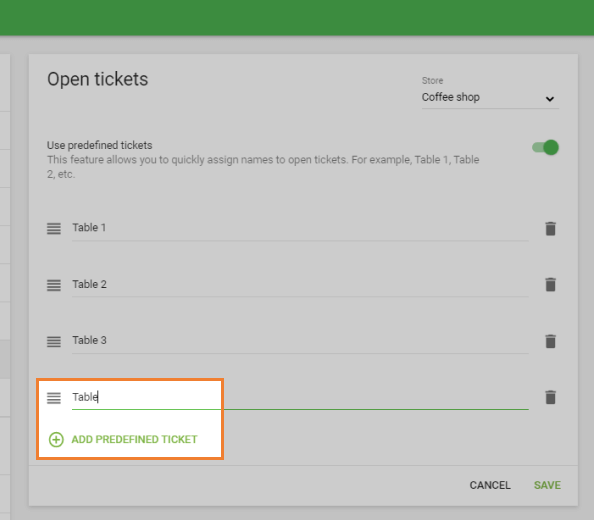
- Enter a name, such as Table 1, Table 2, Table 3, etc.
- Save your changes.
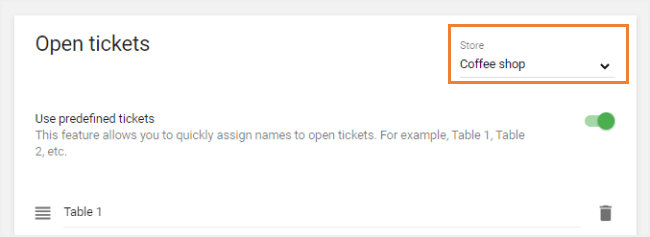
If you have multiple stores, you can configure a separate set of predefined tickets for each location. Use the store selector at the top of the page to switch between stores.
2. Creating Open Tickets
During sales in the Loyverse POS app:
Add items to the ticket as usual.
Tap Save to create an open ticket.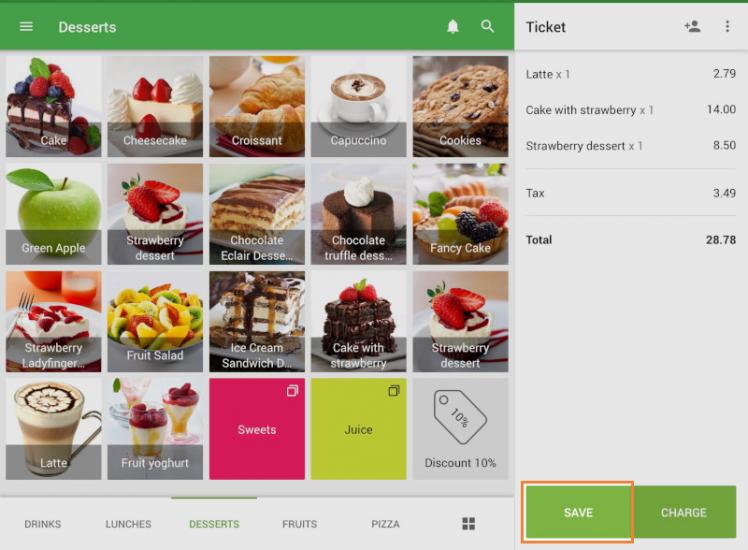
On the next screen, you will see a list of available predefined ticket names.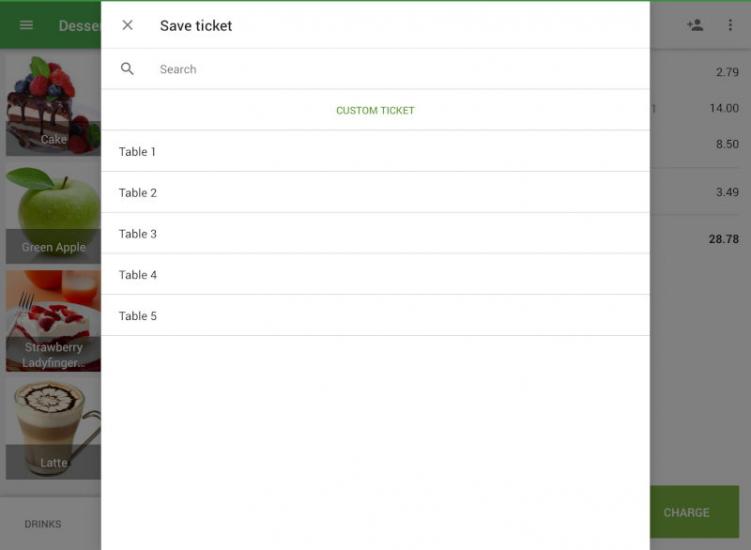
- Select a predefined ticket name to assign it to your ticket.
- Only unused predefined tickets are displayed—occupied ones are hidden.
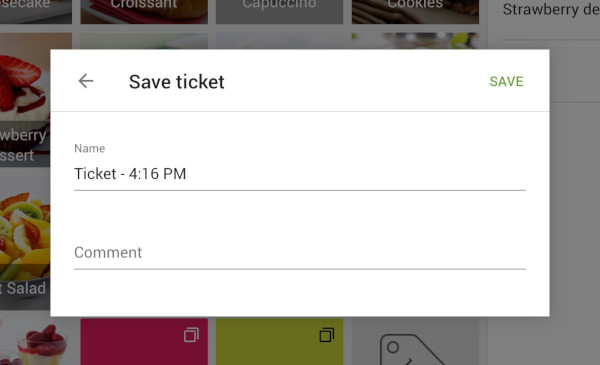
If you prefer not to use a predefined name, choose Custom ticket instead.
Enter the ticket’s Name and Comment, then tap Save.
3. Editing Open Tickets
You can edit, split, or move predefined open tickets just like regular open tickets.
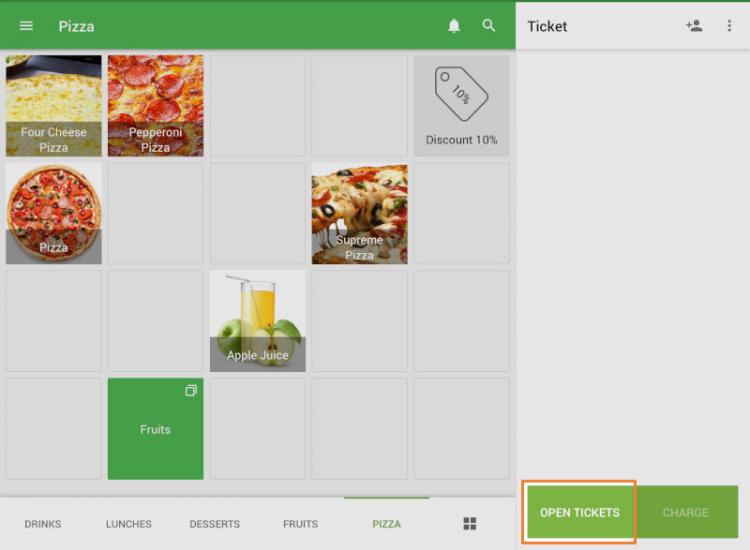
Tap Open tickets on the sale screen to view all active open tickets.
Select the ticket you want to modify.
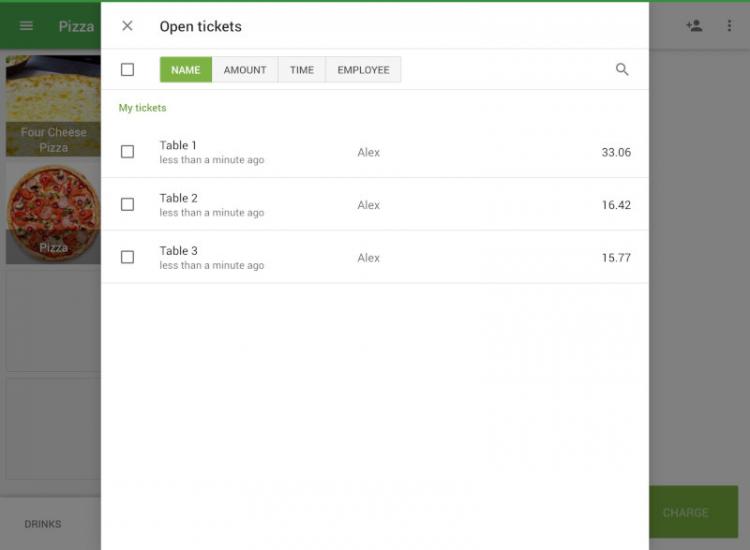
Open the three dots menu (⋮) to choose one of the available actions:
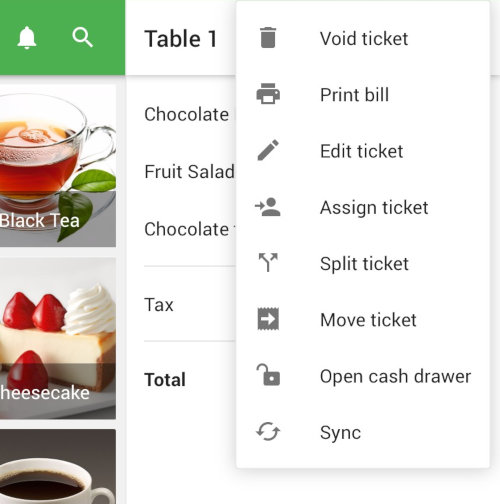
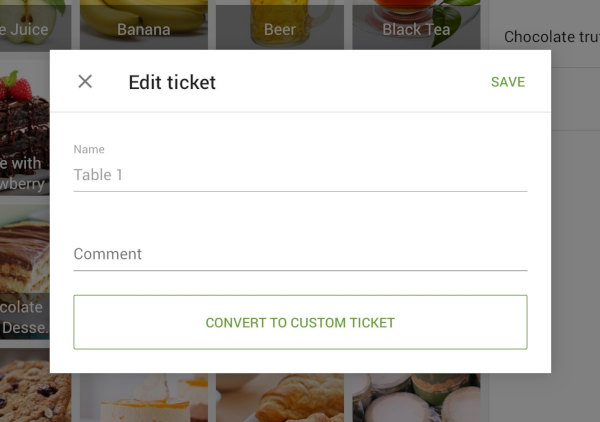
Edit ticket
- Change the comment.
- Convert a predefined ticket into a custom one.
Split ticket
Splitting works the same way as with regular open tickets
(see How to Split an Open Ticket with Loyverse POS).
Move ticket
Predefined ticket workflows use Move ticket instead of Merge ticket.
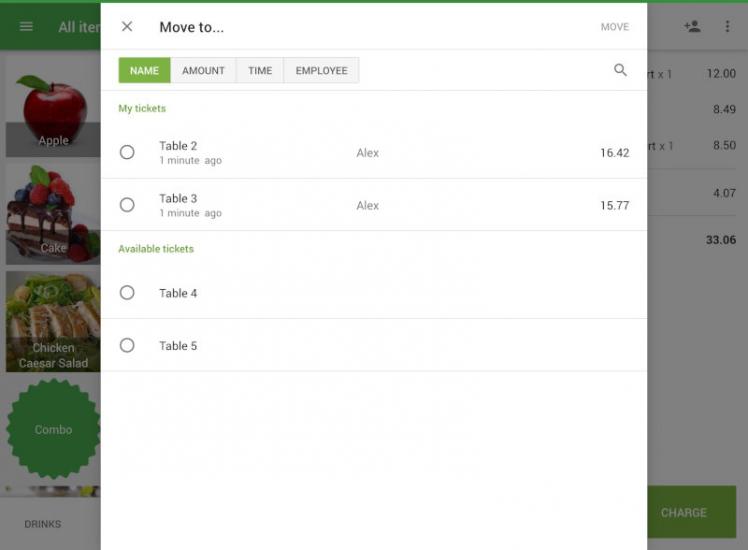
- Select Move ticket.
- Choose the destination ticket (either predefined or custom).
- Tap Move to transfer all items and details to the selected ticket.
See also: