Loyverse POS allows you to manage multiple stores within a single account, giving you centralized control over sales, inventory, employees, and customers across your business network.
Adding a New Store
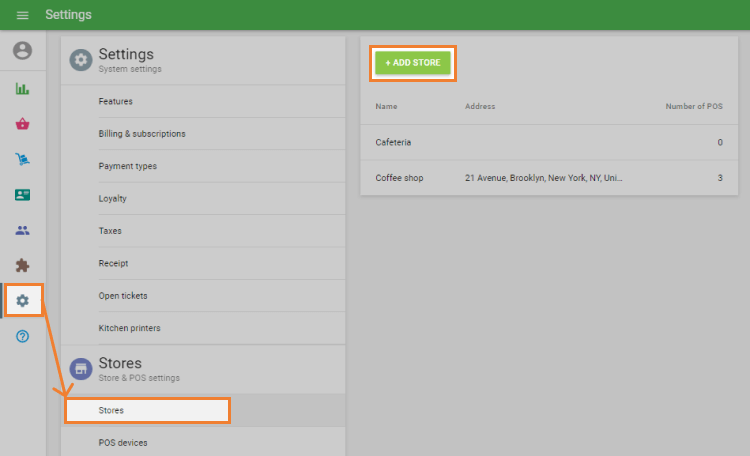
- In the Back Office, go to Settings and click on ‘Stores’.
- Click the ‘Add Store’ button.
Fill in the store details such as Name, Address, Phone, VAT, and Description.
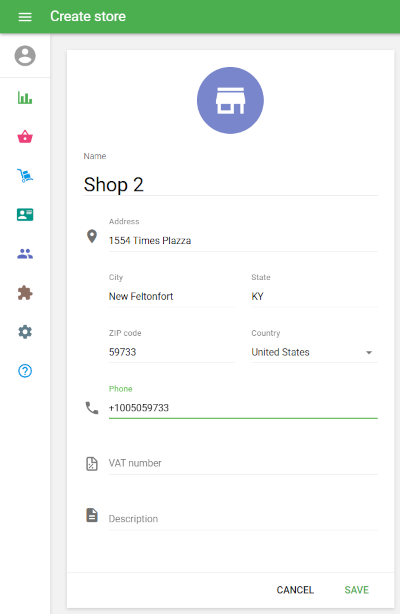
Note: This information will appear on the store receipts.
- Click ‘Save’.
Your new store will appear in the store list. You can now create and assign POS devices to this store.
Items Management Per Store
You can manage key item settings for each individual store:
- Open an item for editing.
- Scroll to the ‘Stores’ section.
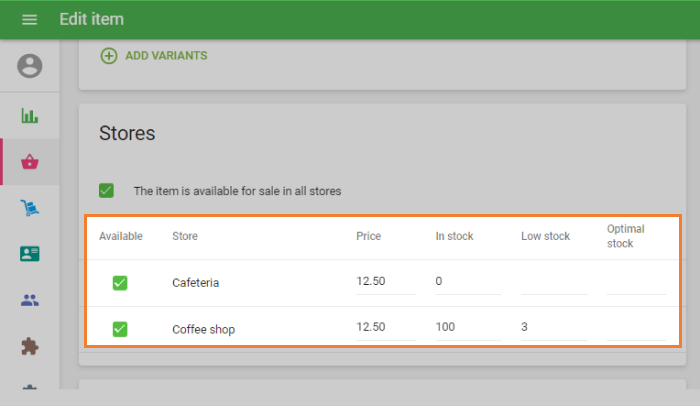
- Adjust price, in-stock quantity, and low-stock notifications per store.
When using the store filter in the item list:
- You’ll only see items available in the selected store.
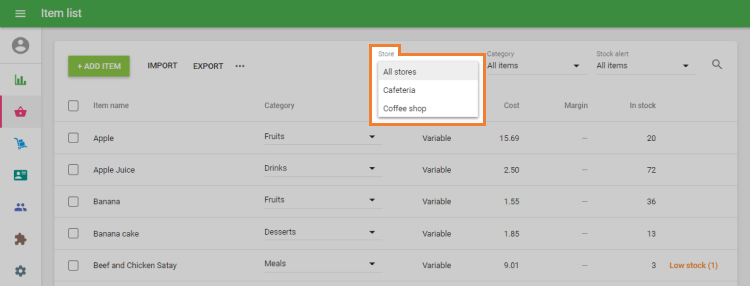
- Composite item ingredients relevant to the store will also be shown.
- The item list displays store-specific price and stock values.
Employee Access Control by Store
To manage which stores employees can access:
- Go to ‘Employee List’ and open an employee’s profile for editing.
- Find the ‘Stores’ section at the bottom of the form.
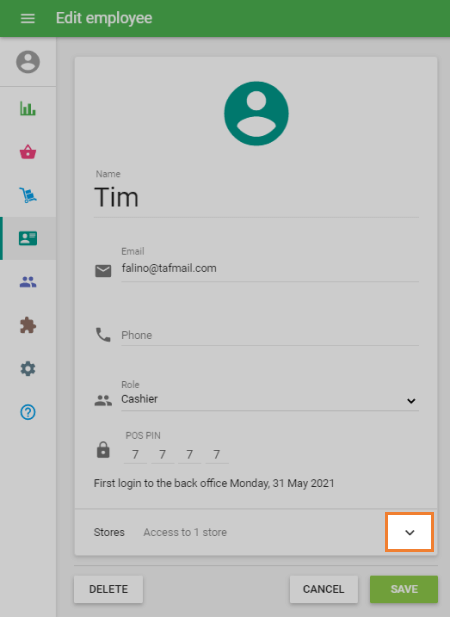
- Click the drop-down arrow to display your store list.
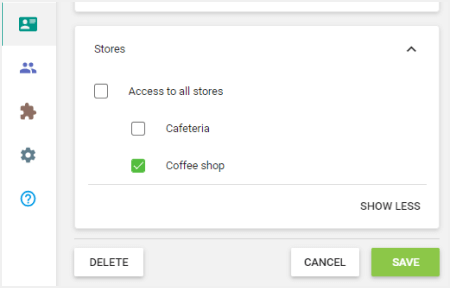
- Select the store(s) the employee should have access to.
- Click ‘Save’.
This feature is helpful when assigning cashiers or managers to specific store locations.
Sales Reports by Store
In the Back Office, go to the ‘Reports’ section.
- Use the store filter to view reports for a specific store or all stores combined.
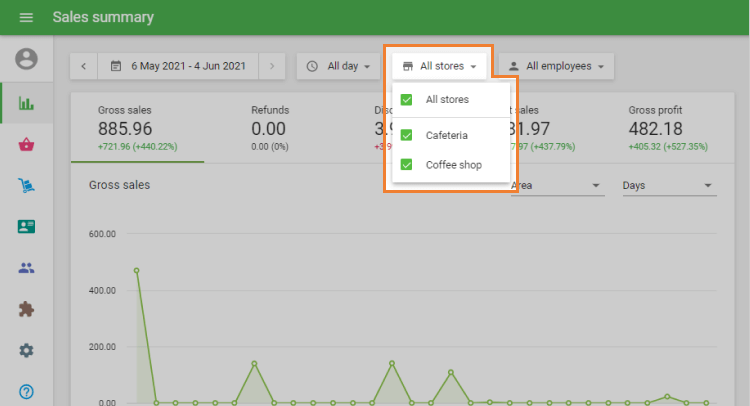
Reports such as sales summary, sales by item, category, or employee can be filtered by store for detailed insights.
Customer Management Across Stores
- You can manage your entire customer base from the Back Office across all stores. This includes creating, editing, or deleting customer profiles.
- Customers can earn and redeem loyalty points in any store connected to your account.
- While you can view and edit customer profiles from any store at the POS, you can only track their purchase history for the current store.
- This centralized management supports consistent service and loyalty benefits across all your locations.
Loyverse’s multi-store management ensures consistent and efficient operations across your business locations.
See also:
Setting Up Your Shop in Loyverse Back Office
How to Add Items and Categories
How to Add an Employee in Loyverse POS