A customer loyalty program helps motivate repeat purchases by rewarding customers with points for every sale. With Loyverse POS, setting up a loyalty program is simple and flexible.
Step 1: Enable the Loyalty Program
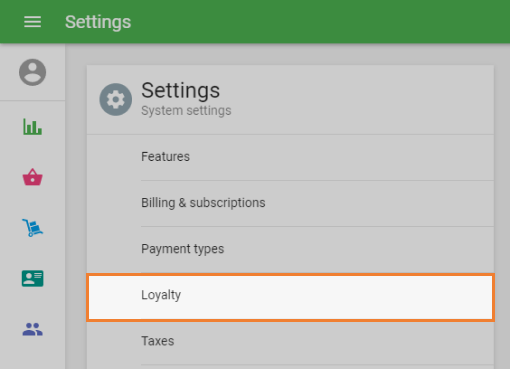
Log in to the Back Office of your Loyverse account.
Navigate to the Settings menu.
Click on the ‘Loyalty’ option.
Step 2: Configure the Program
By default, the loyalty program gives 1 point for every 100 currency units (e.g., dollars, euros) spent — this corresponds to a 1% reward rate.
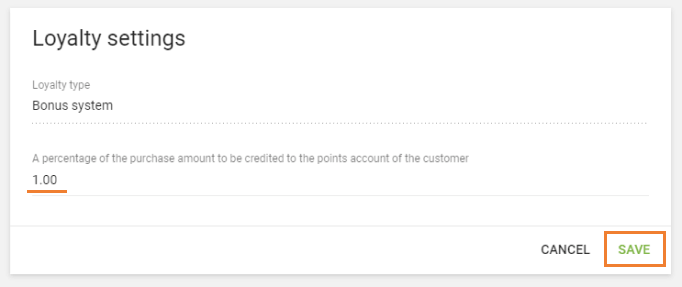
You can adjust the percentage to suit your needs. For example:
- 2% → 2 points per $100 spent
- 5% → 5 points per $100 spent
1 point = 1 unit of currency (e.g., $1, €1) when redeemed for a discount.
Don’t forget to click ‘Save’ after setting your preferred percentage.
Step 3: Start Using the Loyalty Program
Customers earn points automatically when they’re added to a sale.
You can add new customers directly from the POS or create them in advance through the ‘Customers’ section in the Back Office.
Redeeming Points
When a customer wants, they can use points to redeem them for a discount during checkout.
For example, if a customer has 10 points, they can redeem them for a $10 discount on their next purchase.
Loyalty Program Visibility
Customers can see their accumulated points on the printed or emailed receipts.
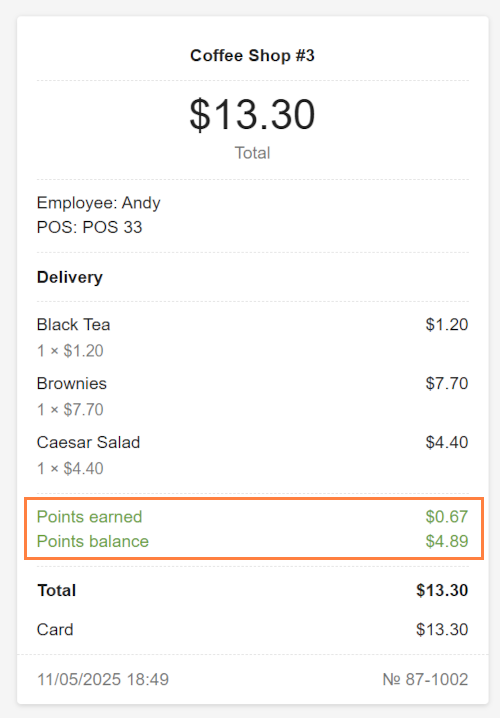
Employees will see a customer's available points on the POS screen once the customer is added to the ticket.
Important Notes
- The loyalty program applies to all POS devices and all stores in your account.
Customers can earn and redeem points across all stores in your chain. - Loyalty points are only available for registered customers.
A well-configured loyalty program builds stronger relationships with customers and keeps them coming back. With Loyverse POS, it’s easy to implement and manage — even across multiple store locations.
See also: